Cross stitch for beginners: technique and program on video and photo, using 1,2 and 3 threads
But you can master one of the most spectacular techniques – cross-stitching in just a couple of evenings. It is considered the simplest and most accessible, but at the same time it is impossible to deny it expressiveness and originality.
Touching "grandmother's" napkins and tablecloths with embroidered flowers and birds have remained somewhere in the distant past. Today, on the wave of fashion for exclusive handicraft, this technique is considered to be the leading one in creating unique items for interior decoration. And of course, high fashion did not bypass her attention, the decor of clothes and accessories in this technique is a fresh and relevant trend of recent seasons.
Learning how to work in it and creating your own masterpiece is really not difficult – just master a few simple tricks.
Fashionable cross stitch on the photo:
Cross stitch technique for beginners
Like any fine needlework, this technique requires almost jeweler's precision and careful preparation. No complicated and expensive tools and materials are needed: ordinary hoops, canvas, needles and threads are the easiest needlework kit.
The cross-stitch technique is often referred to as "counting", because during operation it is necessary to accurately count the number of stitches in rows and color blocks. Therefore, the first thing to take care of is a canvas or base that is easy to work with, which will facilitate the counting process.
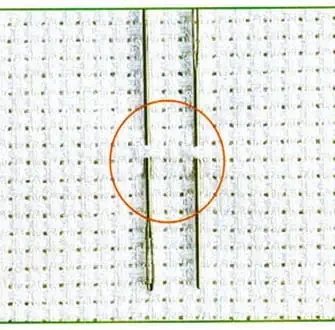
It is better to use, especially at first, a canvas with a large weave, on which the “squares" formed by the interlacing of threads are well read. Such a canvas is usually made of cotton or linen, synthetic materials, in particular vinyl, give a more “readable” structure, which professionals advise beginners to use. Its only disadvantage can be considered only that the structure of the canvas will be clearly visible if the background is not completely sewn up. This effect, by the way, can be used as a stylistic solution for the work as a whole.
Unlike most needlework techniques, even large-sized cross-stitch work can be embroidered in fragments. So, it is not necessary to acquire special hoops at all. Any that will allow you to tightly stretch the base of 20-30 square meters will do. centimeters. Experienced craftswomen advise choosing wooden hoops – they are not only convenient, but also pleasant to work with.
Needles also do not require much choice. To work with a coarse weave, needles of medium thickness with a blunt tip are suitable. The denser the canvas, the thinner the needle should be. The only thing to consider is the size and shape of the eye of the needle, it should easily pass the thread and at the same time not deform the canvas.
A variety of threads are used in cross-stitch, but cotton and silk floss, as well as thin twisted wool yarn, are considered traditional. Such threads softly "lay" into the stitches, create an even, smooth texture and look great in the finished work. In addition, you will not have any problems with the selection of even the rarest shades and color combinations – the choice of today's proposals is simply endless.
Cross stitch: how to fasten the thread
As in any fine needlework, in this technique, not only the magnificent work itself, but also the impeccably neat inside is considered the pinnacle of skill. On the “clean”, as it is customary to call it, the wrong side should not have any flaws: long stitches and ties that occur when moving from one piece of work to another.
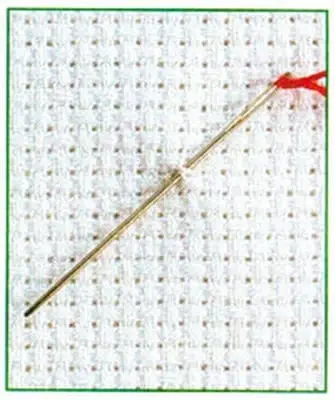
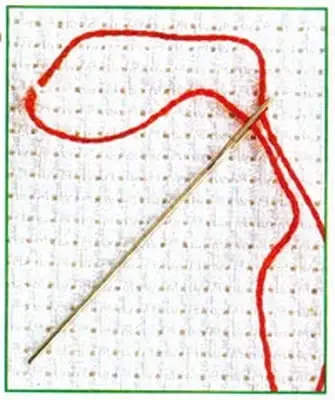
But in an ideal "clean" work, there are no… not even knots on the wrong side. The fact is that when embroidering with a cross, the thread is fixed in a special way. To do this, a piece of thread is folded in half in the middle and the resulting "loop" is threaded into the eye of the needle.
After that, having determined the place to start work, the needle is inserted into the lower left corner of the “square” of the canvas. The same “loop” should remain on the front side. Stepping back literally a millimeter, the needle is again brought to the front side and the knot is tightened. They return the needle to the wrong side, and easily pulling the thread, bring the knot there. The result is a miniature strong knot, almost invisible from the front or from the wrong side of the work.
Another technique that is worth mastering when taking the first steps is attaching a new thread. When moving from color to color, and this is especially important in multi-color compositions, a new thread must be carefully introduced into the pattern. To do this, a new thread on the wrong side must be pulled under a few stitches exactly to the place from where you will begin to embroider with it. In this place it is necessary to make a neat stitch “back to the needle”. Everything, the new thread is securely fixed and you can continue to work.
In the same way, with the help of the “back needle” stitch in cross-stitch, the thread is fixed at the end of the work. The tail of the working thread, about 5 centimeters long, is brought to the wrong side, passed through the next few stitches and secured with a “back to the needle” stitch.
Easy Cross Stitch Technique for Beginners
The main secret of beautiful and spectacular embroidery is even and uniform stitches. To make them look like this without much effort, you need to take as a basis a canvas with a large, clear interlacing of threads, which literally divides it into “cells”, on which it is easy to make even stitches.
A needle with a thread fixed on the wrong side is brought out to the lower left corner of the “cell” of the canvas and brought out to the wrong side in the upper right corner – strictly diagonally. And then they make a “mirror” stitch: from right to left and get a perfectly even cross. Even for beginners, the cross-stitch technique is simple and affordable.
There are two ways to lay out stitches on canvas: English and Danish. English or traditional way – the first cross is embroidered separately and in its entirety, like each subsequent one, laid out in turn, they form a row, and then a color block. And according to the Danish method, in each row, the lower stitches are laid out first – from left to right, and then they are “closed” with the upper stitches, going in the opposite direction.
The choice of method is a matter of personal preference, and in both cases, the front side of the work is smooth and uniform, and the wrong side is neat. But it is worth trying both methods, and choose the most convenient for yourself. Often, especially in large works, they are combined, since it is more convenient for English to lay out vertical rows, and for Danish – horizontal.
For the first works, it is worth choosing simple schemes in which no more than three or four colors are involved. Choose a simple, proportional pattern with medium-sized details. This makes it easier to try out the nuances of the technique and develop your own style of work.
Cotton floss is ideal for the first work. Experienced needlewomen recommend starting to master cross-stitching in two strands.
How to learn cross stitch from video
Patterns and programs for cross stitch:
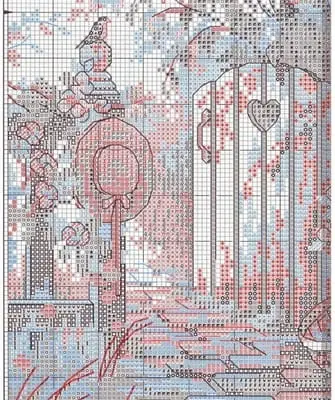
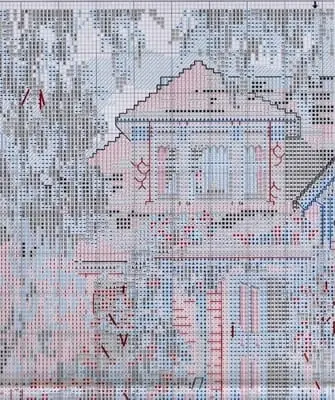
From the first stitches to complex plot canvases, in fact – just a few steps, this technique is so simple and fascinating. Especially if you use well-designed patterns that take into account all the features of cross-stitch. This embroidery technique is not called counting for nothing – it is better to entrust the preliminary careful calculation of schemes to professionals and use ready-made schemes. Fortunately, today there are offers for every taste – from still lifes and landscapes and genre scenes to reproductions of famous paintings.
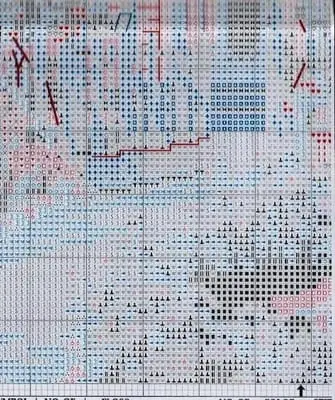
All ready-made schemes, regardless of their complexity, are built according to the same principle. Each square of the scheme corresponds to the future cross on the canvas, and the symbol or number indicated in it corresponds to the color of the threads. You just have to choose the right shades. You can, especially at first, use ready-made kits that take into account everything – from the size of the canvas needed for work to the combination of colors and shades.
But one of the most interesting solutions that allow you to feel like a real designer is cross-stitch programs. They allow you to translate any image into a well-designed scheme, it can be a photo taken by you yourself or an image taken from the Internet. Programs provide unlimited scope for choosing a plot and embodying your own creative ideas, especially since they are designed for the average user, they are not complex and do not require special knowledge in design.
Today there are many such programs, but they all work on the same principle: you load an image into the program, and it calculates the future embroidery for you down to the smallest detail. The selection of threads, their number, color combinations and canvas size, you can even get an image of your work in finished form. But most importantly, the program will provide you with a scheme that is impeccable in its accuracy – you just have to pick up a needle. But it is worth considering that the more complex the plot of the intended work, the higher the level of your skill should be.
Cross stitch: technique
Before you get started, make sure you have everything you need on hand. Most often it happens that in the process of work there may not be threads of any shade that is important for the overall color scheme. It turns out, as a rule, at the most inopportune moment. Therefore, it is worth using the rule that experienced embroiderers adhere to: there is never too much thread. Collect your own palette, it will definitely come in handy.

If you have already decided on the scheme, then you can proceed directly to work. First of all, you need to pull the canvas tightly and tightly on the hoop – this way you will better see its natural markings. The hoop does not have to be large, the technique allows you to embroider in fragments, dragging the canvas during work. It is enough that they "hold" a fragment of 20-30 square meters. centimeters is the most convenient option for work.
Where to begin? First of all, from the definition of the center of the composition or drawing, you need to start working from it. The best way to keep the proportions and dimensions is to mark the diagonals on the canvas and stick to them as the main directions. It is best to fill the canvas according to the “snowflake” principle, moving evenly from the center to the edges.
If you have chosen a complex scheme, start with the largest area of the same color. It is also better to start with darker color blocks – this way you will set the desired contour, which is easier to complement with lighter shades and colors. And be sure to cross out already embroidered sections from the scheme so that you do not mistakenly return to them again!
The technique of cross-stitching does not depend on the size of the work or on the complexity of the plot. Work with the English or Danish method – the choice is yours. But in large works, it is worth considering color transitions, avoiding long ties on the wrong side of the work. It is best to stitch the pattern not with separate crosses, but with solid color “blocks”. Trying to finish them so as to lay the last stitch as close to the first as possible.
It is also important to follow the direction of the stitches. If you started laying the bottom stitches from left to right, and the top stitches from right to left, absolutely the entire pattern should be done in this vein. Thus, you will get an almost perfect front side.
Stitches that "look" the other way are used to achieve certain visual effects, and this must be reflected in the scheme.
The basics of cross stitch technique on video:
Cross stitch: how many threads – 2 or 1?
This question inevitably arises before the start of any, especially large-scale work. The correct answer to it can only be given by the scheme that you have chosen and personal preferences. Someone loves translucent airy textures, someone prefers voluminous and dense ones – this effect is given by threads in several additions. More often they are used to work on large blocks of color, a contrasting canvas of color, or to give an additional effect of volume that a drawing requires.
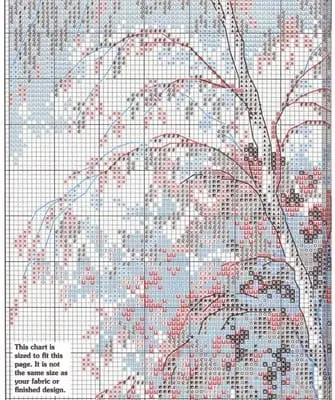
For example, in landscapes. The crown of a tree embroidered with a three-strand cross will have an effect similar to 3D, especially against the background of the rest of the pattern. And the clouds embroidered with a cross in one thread will enhance the impression of a complex spatial composition – the canvas will shine through them, and they will look more transparent and airy than the main background. You can create voluminous compositions in this way in any work, sometimes it is “embedded” in the scheme itself, and in some cases such a solution can be added on your own. Fantasy and creativity in this technique work wonders.
But when choosing the number of threads, it is worth considering the size of the sections of the canvas, the larger its “cells”, the thicker and more voluminous the thread can be taken to work. Most often, cross-stitch is done in 2 threads, but when starting a large work, for example, creating a picture or a wall panel, it is better to try your choice on a sample. A small square measuring 5×5 centimeters will give you a complete idea of how the texture of the finished work will look like.
Mouline thread, as you know, is produced in skeins of different footage, each manufacturer has his own. But each skein of floss consists of six thin threads, which must be properly divided before starting work – if you don't know how to do it right and try to separate the threads in a common skein, you can hopelessly ruin the whole skein.
First you need to carefully unwind the skein and cut off the desired length from the total skein – 60-70 centimeters. This is the most convenient length for work – the thread will not get tangled, and the hand will not have to be bent and unbent during work.
Then, slightly fluffing the tip of the skein, you need to carefully pull out one thread, after which the skein is straightened again. The threads are pulled out only one at a time!
In order to save time and make the process of cross-stitching, for example, in 3 threads easier and more pleasant, the threads should be prepared in advance. They can be threaded into needles or use a special organizer.