Paper crafts flowers, bouquets, patterns and schemes of paper flowers
Paper flowers
There are many ways to make paper flowers. From simple ones that even a younger student can master, to complex ones that will have to tinker with. But it's worth it. Paper flowers can not only become crafts for school, but also a full-fledged home decor.
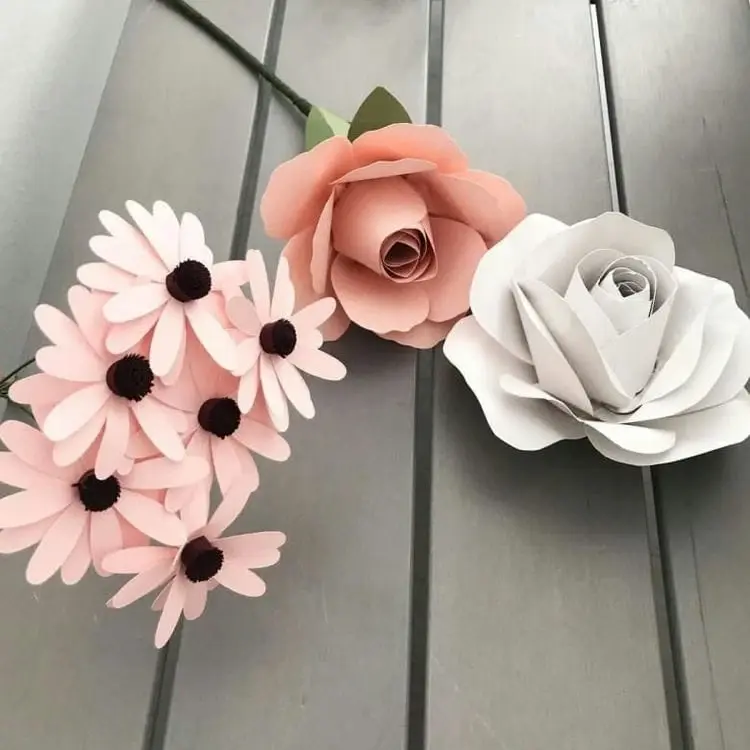
simple roses
This example is suitable for postcards. The option with a simple rose will pleasantly surprise you. A variation of this technique is interesting in execution and does not require any additional costs. It's done very quickly.
This will require:
- colored paper
- PVA glue
- scissors
- pencil
Progress:
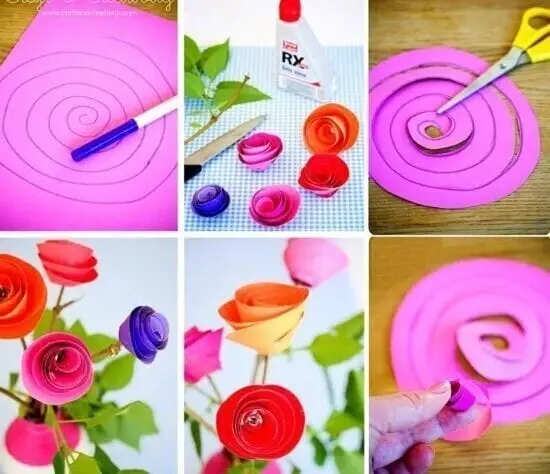
We take colored paper and approximately outline spiral lines along it.
Cut out a spiral along the given line in a circle.
Then we twist the rose and glue the ends.
The rose came out pretty quickly and beautifully. This design will serve as a wonderful rainbow accent on the card.
Roses are harder
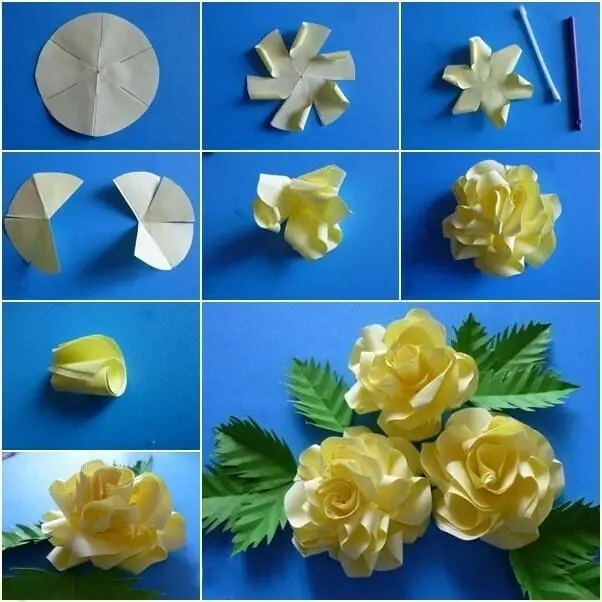
Divide the circle into segments and make cuts. Twist each segment on both sides. From an incomplete circle, make smaller petal blanks.
Connect everything. It also turns out quite a beautiful and unusual rose. How are you?
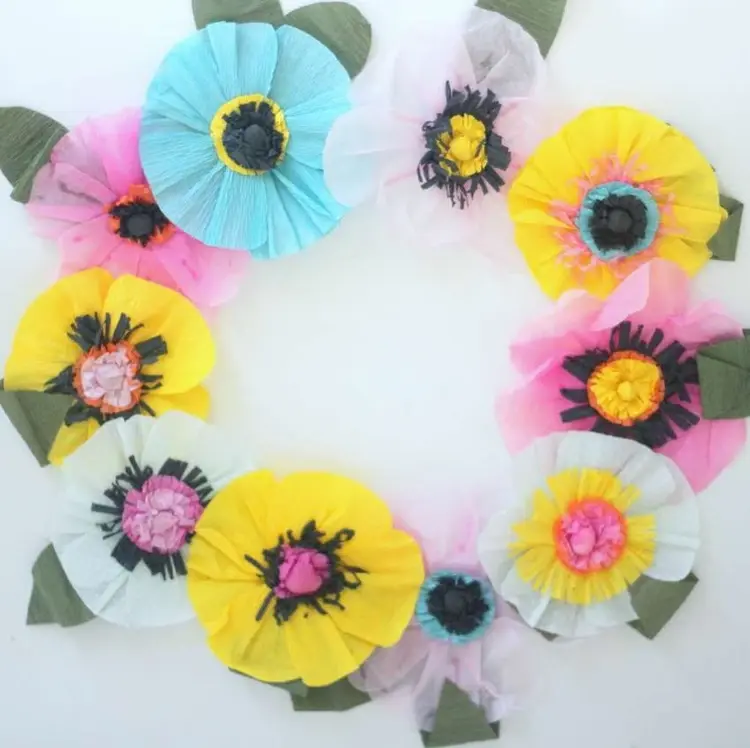
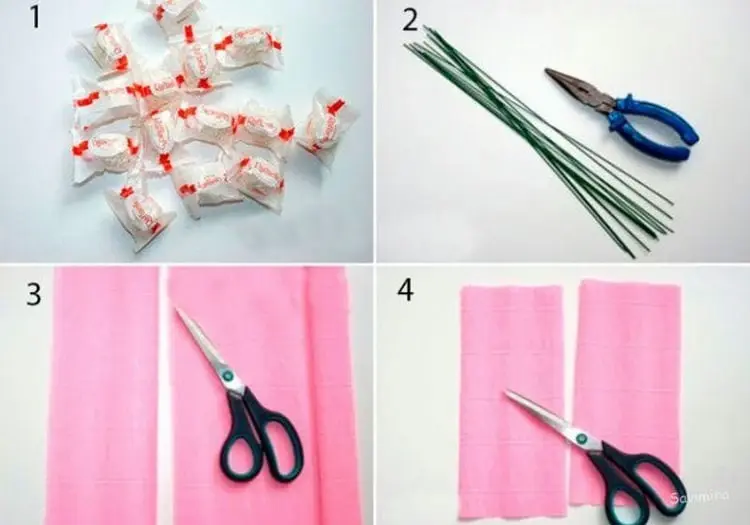
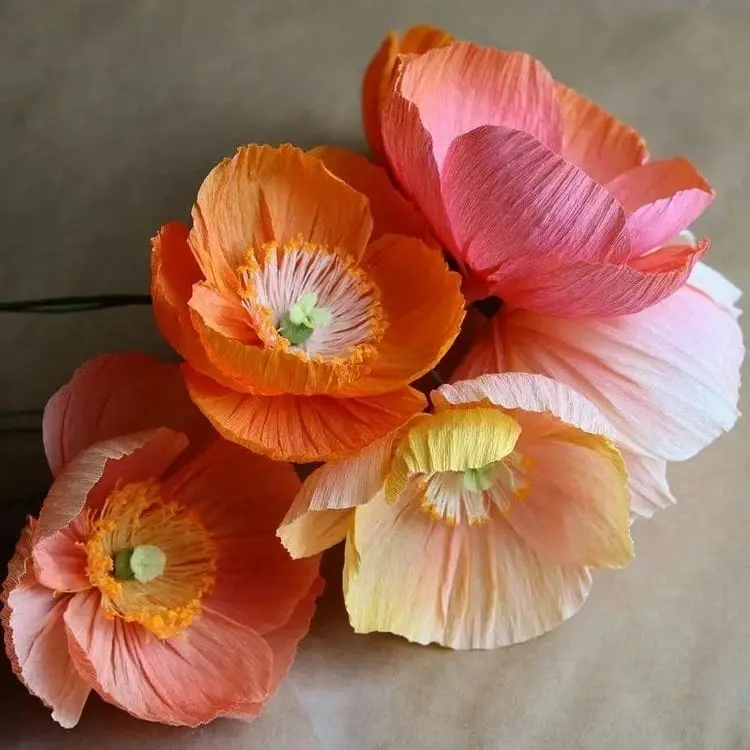
Crepe paper poppy flowers
In this master class we will make such bright and beautiful poppies.
Materials and tools:
- corrugated or crepe paper in green and red;
- black threads;
- wire;
- scissors;
- glue gun with a stick of glue.
Cut off a wide strip from the red roll.
Then, on a piece of cardboard, draw a poppy petal template and cut it out.
We apply it to the crepe strip and cut out the petals along the contour.
Without laying out the petals, we stretch their central part to form a recess.
From black threads we create poppy stamens. We wind 20-25 turns of thread on the index and middle fingers. In the center we tie the turns or clamp with a thin wire. We remove the resulting bow from the fingers and cut the ends of the loops.
We roll the middle of the poppy from a green segment. Then we wrap the ball with a piece of black thread. We fix the intersection of the turns with a drop of hot glue.
Now glue the ball to the bunch of stamens and spread the tips evenly around the pestle. The core of the poppy is ready.
Glue six petals to its lower part.
The first flower bud from crepe paper is ready!
We form stems from the wire and wrap them tightly with a green crepe strip. From the same color we make leaves.
Cupcake mold flowers

Flowers can be made from a variety of materials. Would you believe these flowers are made from cupcake liners? This project is the perfect craft for kids. Guaranteed!
The first step is to wrap some styrofoam balls in cupcake liners and then make a flower wire stem. Then you need to cut out rectangles from cupcake molds of different sizes. Start with a lighter pink in the center, adding darker pinks and larger petals on the outside of the flower. If you are making paper flowers for the first time, repeating this process will take approximately 2-3 hours. It's a little tedious to glue each petal to the base, but it's not hard work and you can see the result in the photo.
Finally, add the leaves and wrap the stem in green paper.
Blooming cactus from napkins
Blooming cactus is unusually beautiful! But because of the prickly needles, not many people breed cacti and you can see their flowering only in the pictures. Let's make a cactus that is both safe and very beautiful!
We will need:
- Scissors;
- PVA glue and glue stick;
- Round small jar or container (for a flower pot);
- Napkins (green, yellow / orange / red – for a flower, burgundy or brown – for the soil;
- Stapler;
- Decorative tape;
- A small long box (for perfume or medicine).
Let's start "growing" a cactus! First, decorate the flower pot – fix the decorative ribbon on the jar. You can wrap once or twice as you see fit.
Now take green napkins and cut them into 4 parts. You can cut several napkins at once.
Next, you need to separate all the small squares and crumple each. This will be the base for the cactus.
We proceed to the "growing" of greenery on the trunk. We take a box and apply glue to it with a glue stick.
And then glue the resulting "leaves" on all sides. It must be glued tightly so that there is no gap. At the top we leave free space – a paper flower will be located here. Here is such a "cactus" is obtained!
Cactus flowers are very bright and lush. Take 2-3 bright-colored napkins and connect them in the center with a stapler, crosswise. Draw a circle and cut it out.
Now we begin to crumple the edges of the napkins to the center, starting from the topmost circle. It should be such a magnificent flower!
We glue the flower to the place that we left empty on the trunk.
From dark-colored napkins we make blanks for the soil, just like greens were made.
We apply glue to the bottom of the pot, especially in the middle. We glue the cactus first, and then the soil around it.
With the help of a thin brush and white paint, you can mark the needles. Here is such a handsome cactus turned out! Bright and not scratchy at all!
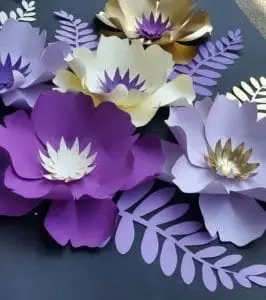
paper carnation
What you need to prepare: double-sided lavender paper, scissors, stationery glue, flower stem and ready-made stamens (sold in the departments for creativity).
We cut out the petals of the desired shape from lavender-colored paper, press them with the blunt side of a pen or pencil to form a texture, then we fold the first petal with a tube, wrap it with the next petal, gluing it with glue, and so on until the end until the bud acquires the desired splendor. In assurance, stamens are glued into the center, and the bud is planted on the stem of the flower.
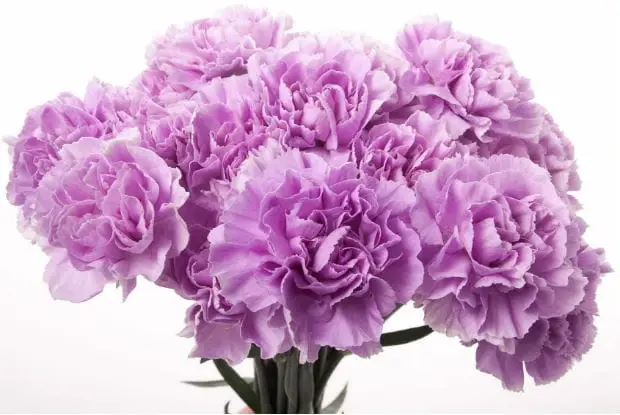
Note – this is what a live lavender carnation looks like.
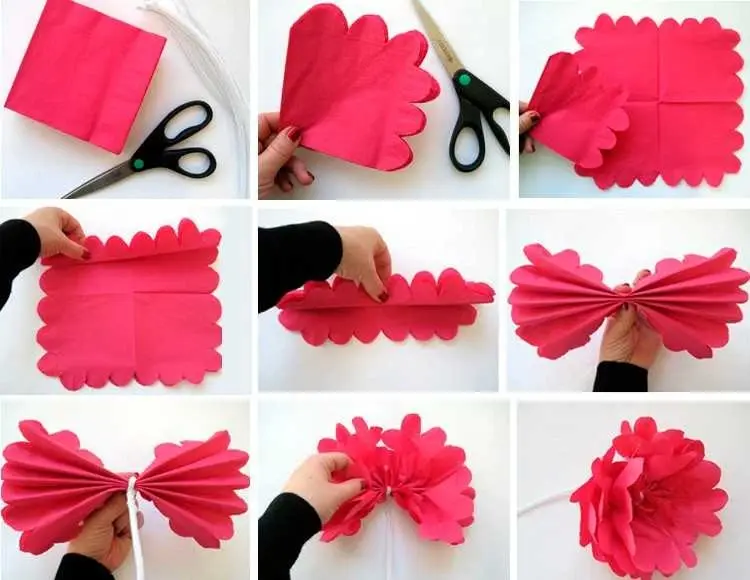
peonies
It is very easy to make peonies from napkins. To do this, fold the napkin into an accordion, tying it with a thread in the middle.
Cut out roundings at the top and straighten the petals. This decoration will look festive on a gift box.
Dahlia
To create a dahlia, you will need to cut out many long, pointed petals from crepe paper. And then alternately connect them onto a cardboard base, starting the assembly from the bottom.
As you move towards the center, use the petals less and less in length to get a nice center.
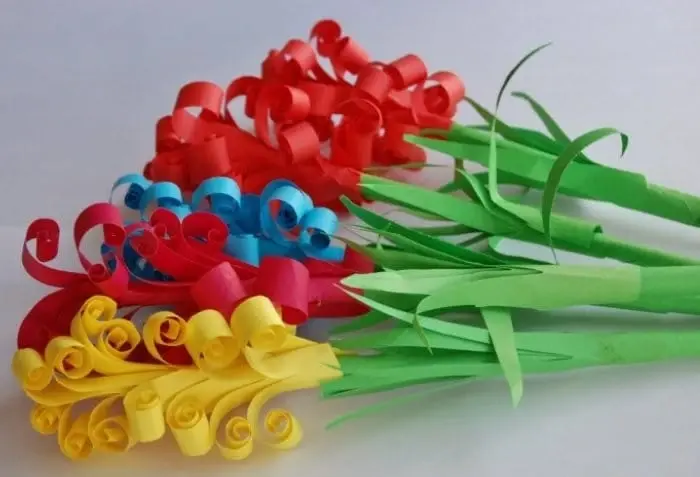
Create a lily of the valley or geacinth
The next paper flower can be called both lily of the valley and hyacinth, since when finished it looks like both. Personally, it reminds me more of a hyacinth, but let's not get hung up on the name, it's better to stretch our fingers and get to work.
Here you will have to tinker a little longer, but there should not be any difficulties. Everything is clearly visible in the picture, we only note that in order for the strips cut on the sheet to curl up, it is necessary to draw them with scissors (building side), pressing hard enough. To make the flower fluffy and curly, on a stick pasted over with green paper we wind the blanks as tightly as possible, starting from the top, smearing the “stem" with glue.
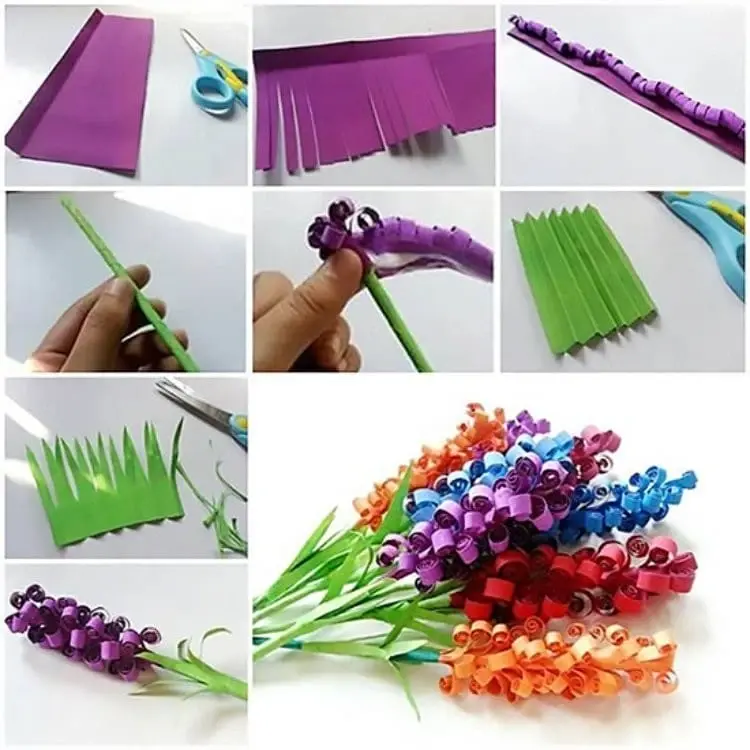
In the second photo, the option is somewhat simpler, the inflorescence is made according to the principle of green leaves from the first option: Read also Do-it-yourself kite. Models, materials, fabrication tips, drawings
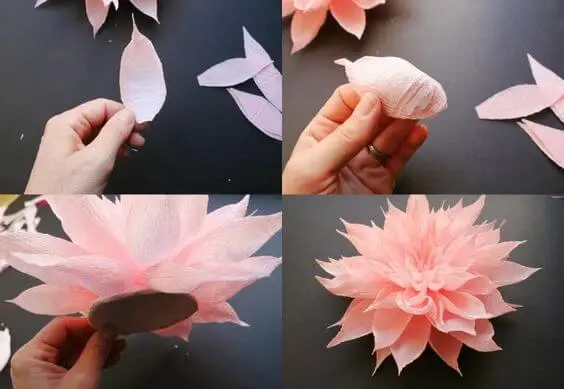
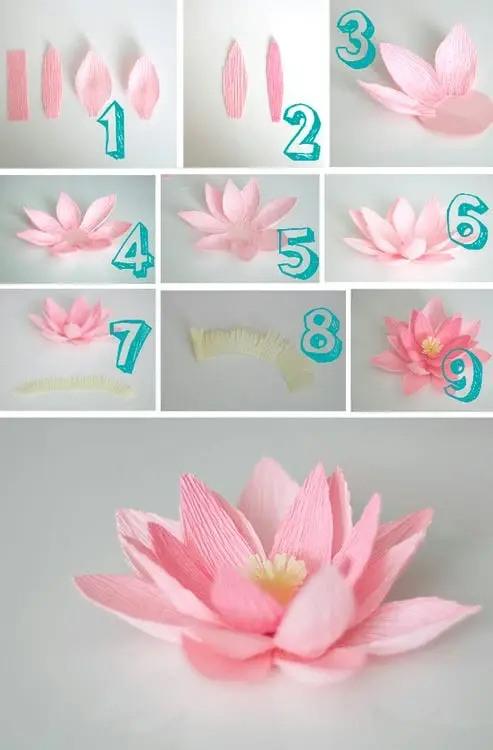
Paper water lily
What you need: pink crepe paper, pink cardboard circle, glue, yellow crepe paper.
This very beautiful flower is made very simply, from pink corrugation. Paper cut out a stack of petals. We stretch each petal wide with our fingers, and in turn glue it to the surface of a pink cardboard mug. In the center we glue the stamens, previously created from yellow paper!

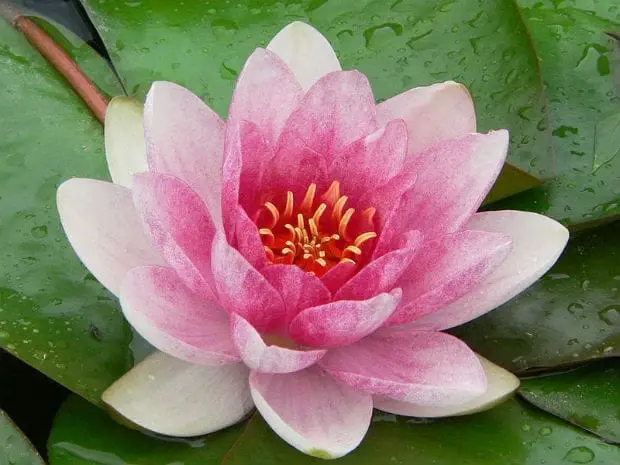
This is what a real water lily looks like in nature.
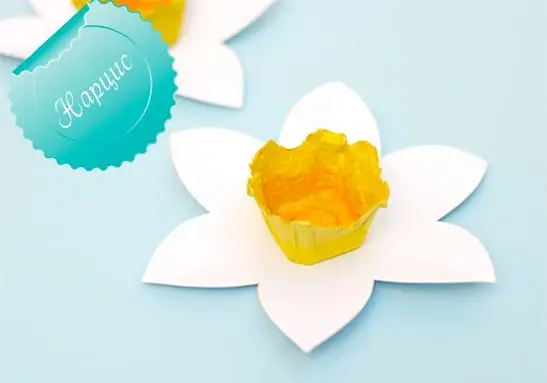
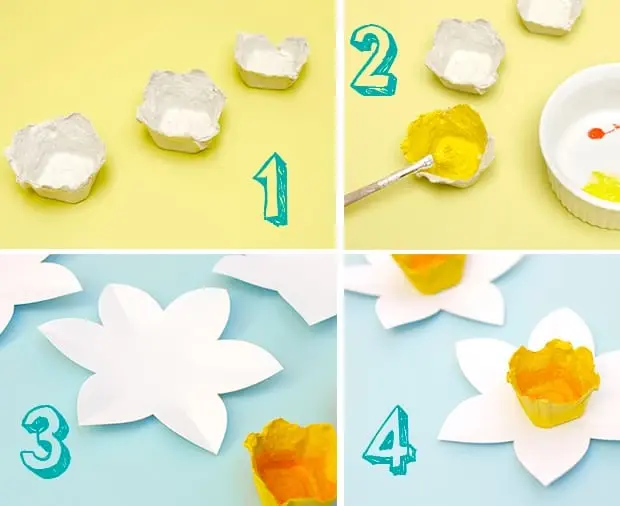
Narcissus is alive
To create a daffodil you will need: cells from an egg box, white paper, yellow acrylic paints, a brush, scissors, glue.
Cut out the inside of the egg storage cell and paint it with yellow acrylic paint. From white thick paper, cut out the outline of the flower petals, running each petal in the center, and glue the two parts together.
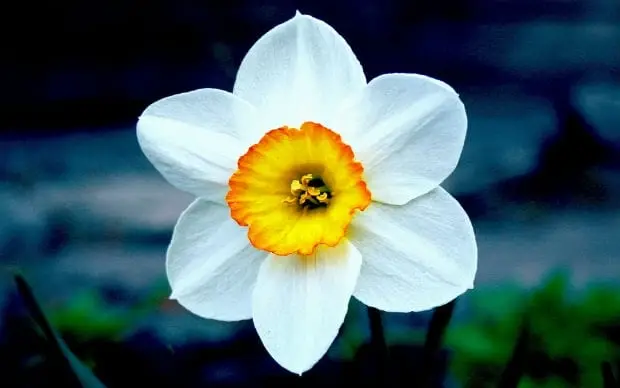
Probably everyone knows what a daffodil looks like, but still, here he is a handsome man in nature.
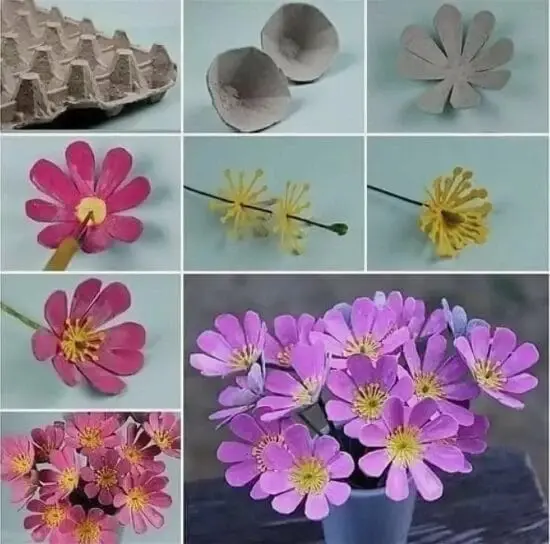
Cosmos from the egg tray
Have you ever tried to make flowers from recycled paper, or rather from an egg tray? Not yet? Then it's time to do it.
See how. We cut each element of the egg tray almost to the center. And give the desired shape to the petals. Now everything needs to be painted with paint in the color we need.
We insert a wire with a core of yellow paper. And now, it turns out natural kosmeya, you can't distinguish it from the real one.
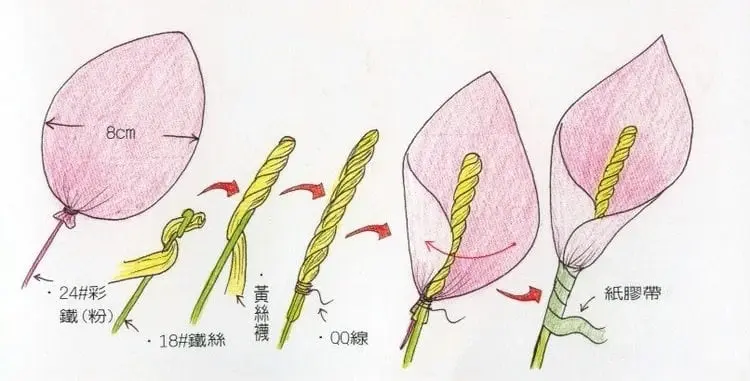
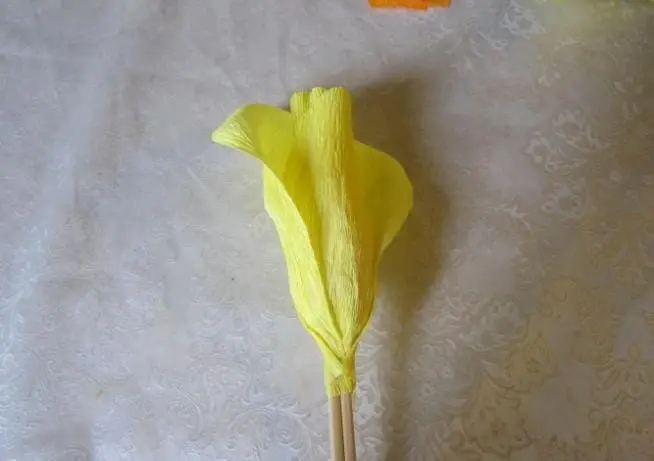
DIY paper callas
Callas are very delicate and beautiful flowers that are well formed into bouquets. Japanese craftsmen offer a simple and very successful way to form a flower, which will require soft wire, colored paper, green tape or paper to finish the wire stem. Having made the right amount, form a bouquet.
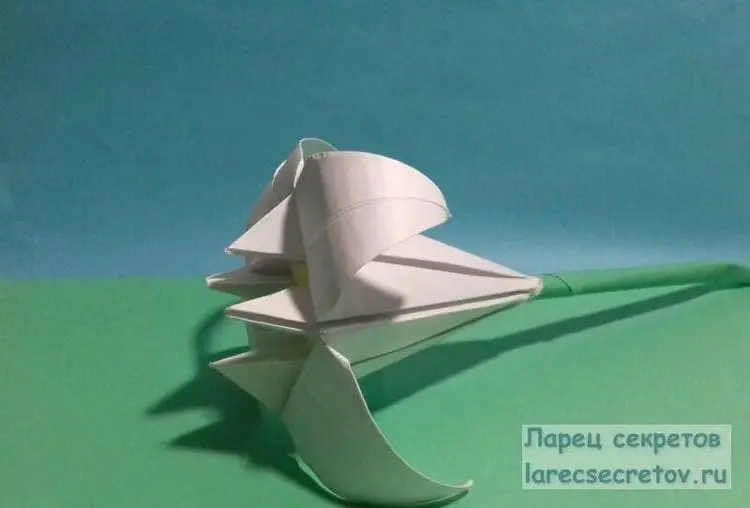
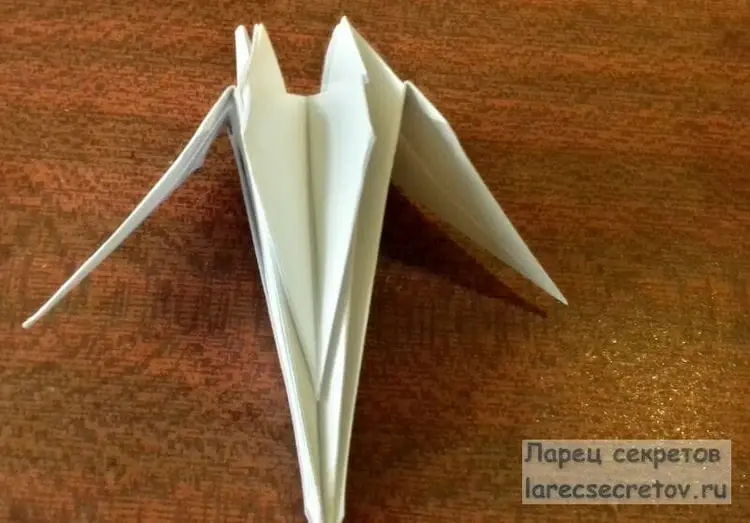
origami lily
Garden lily has a special charm. To create it, you only need paper. Volumetric lily is very easy to do without glue and scissors.
We will need:
- colored paper (green and any other)
Progress:
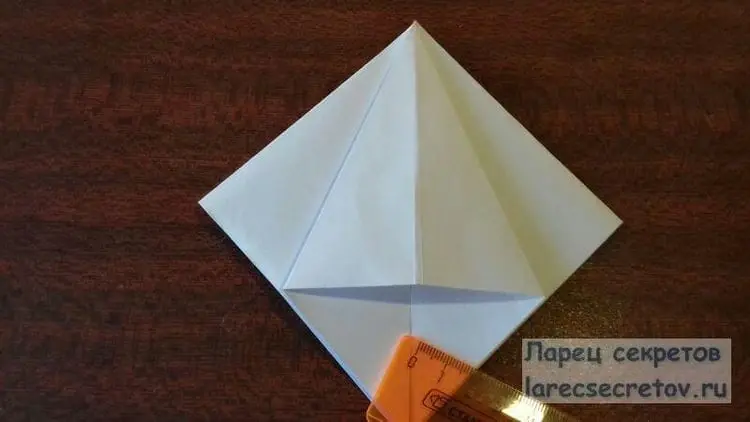
We will need a square of any size, I have a side of 21 cm.
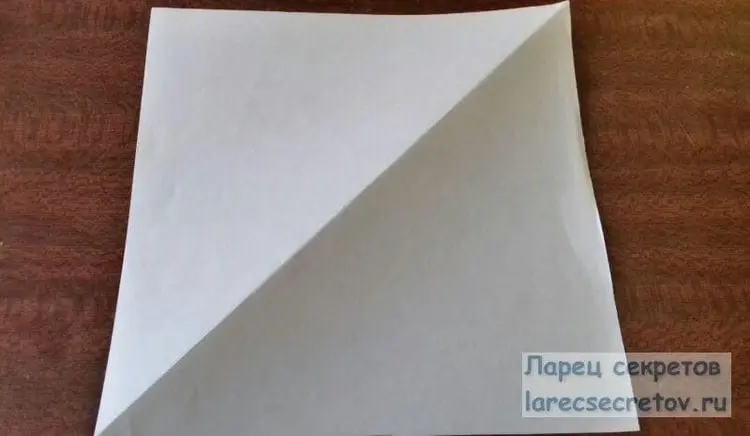
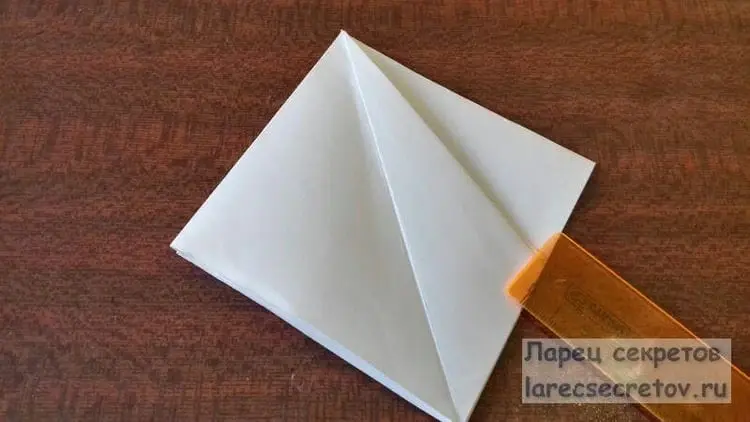
Fold it twice diagonally. Then turn it over and fold it in half 2 more times to make a rectangle.
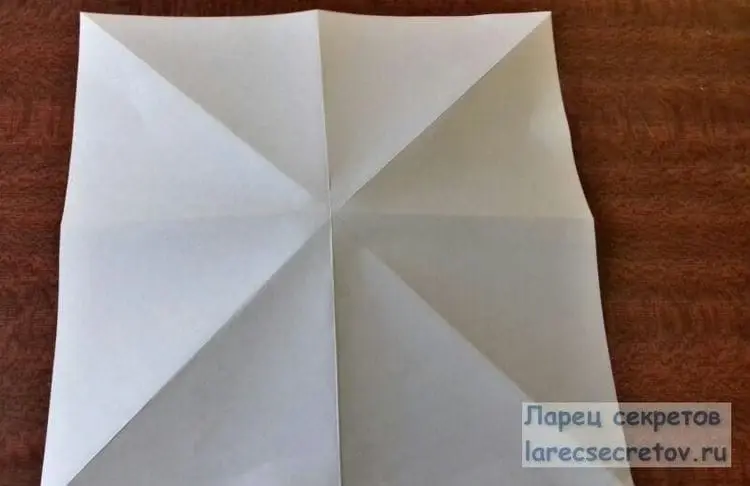
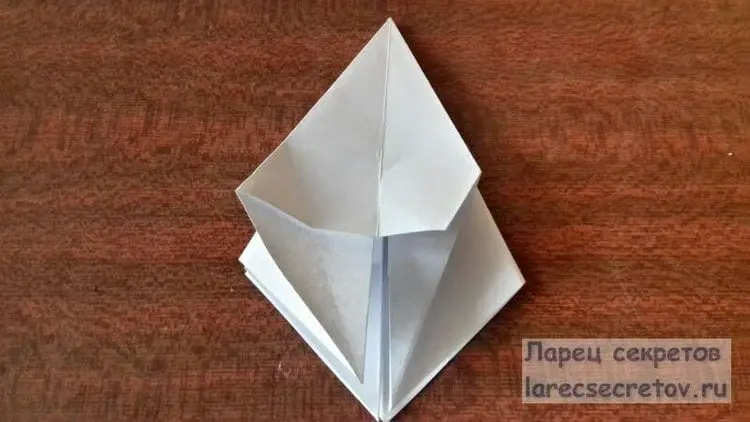
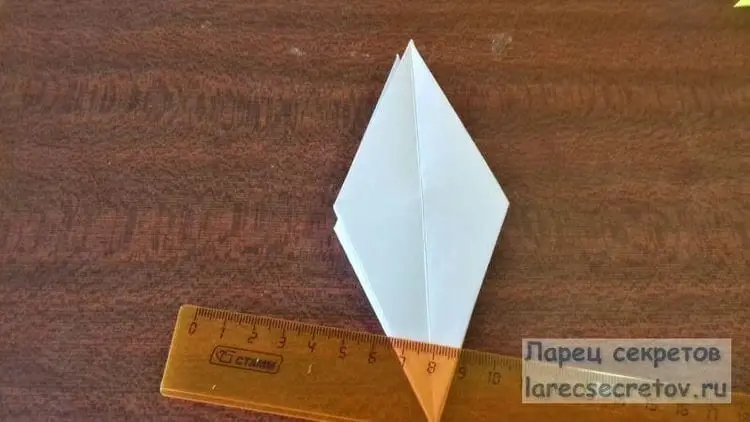
We've marked the folds. With their help, we fold the craft into a small rhombus.
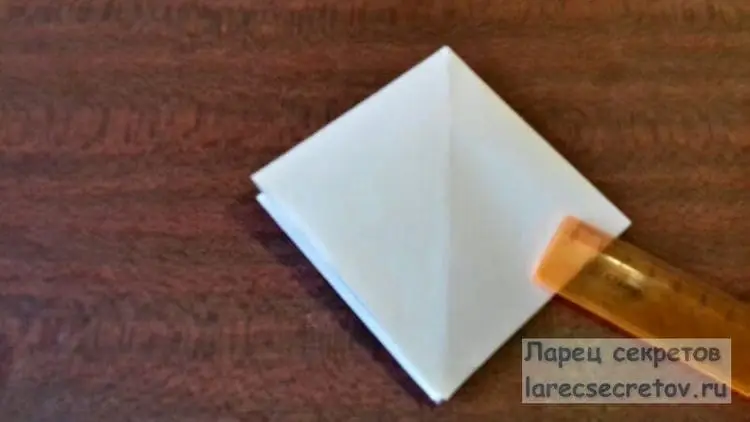
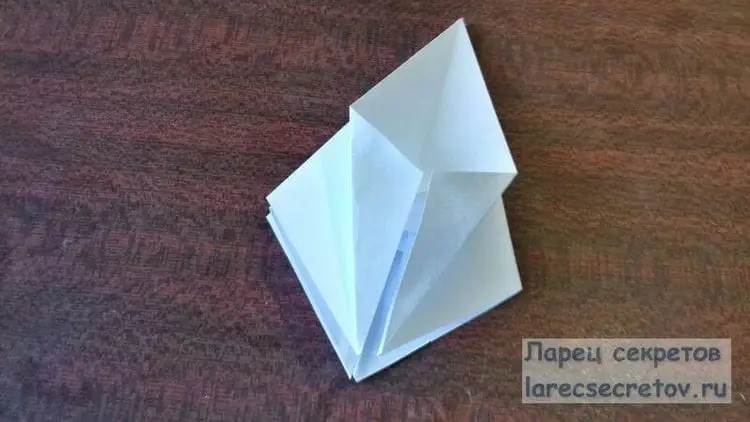
To do this, we take the part by the opposite side corners and connect them, and remove the ribs inward. We have the part branched to us. Next, take one edge and open it.
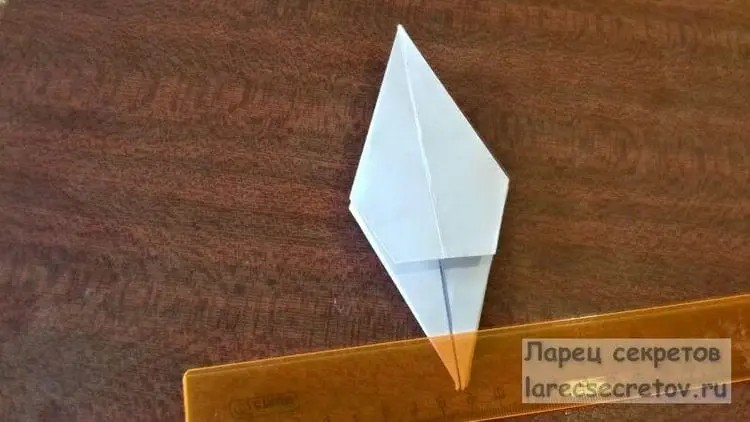
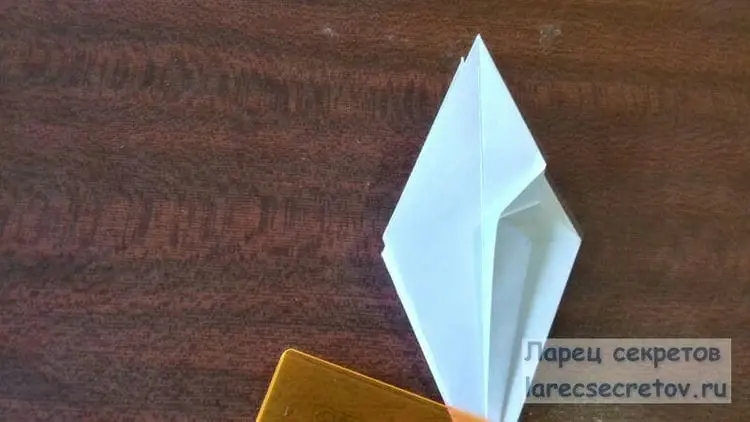
We fold it so that the middle coincides with the line of the petals. We iron well. Then we clean it inside and close it by folding the sides of the figure in half.
We do this with all the details. Then we open the pockets, the ponytails are located towards us.
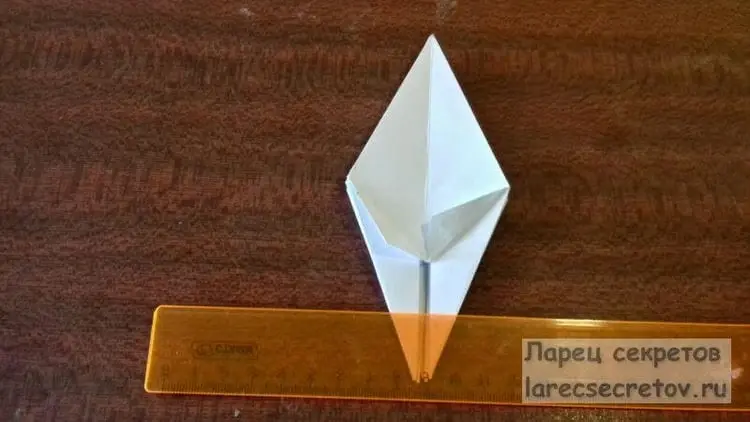
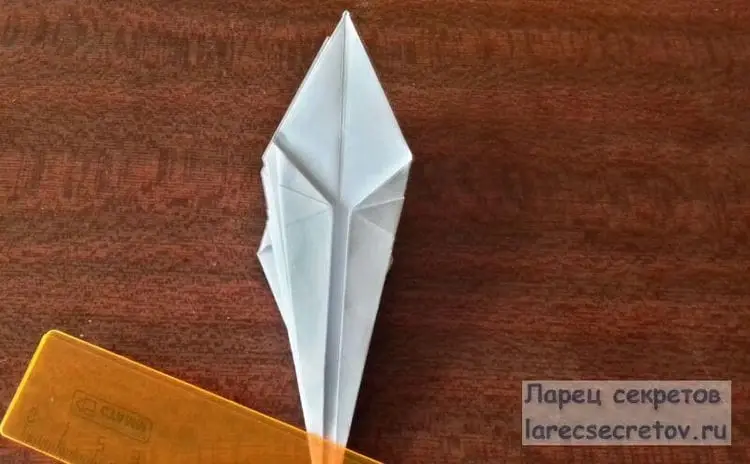
Fold each of them in half. After that, we open them.
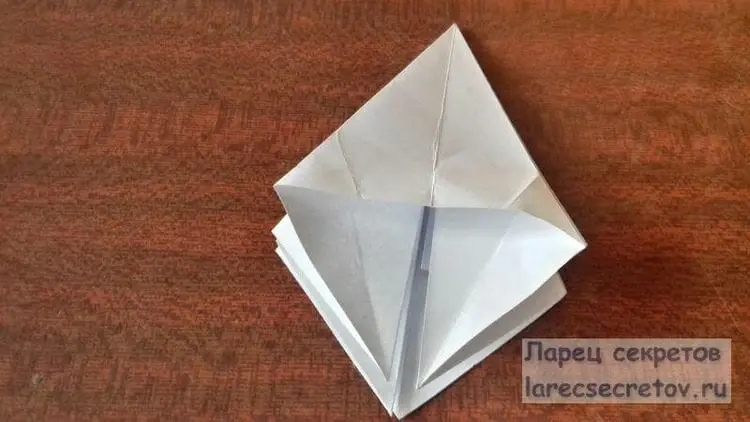
And we remove the ponytails inside along the resulting folds.
Let's do this with all sides.
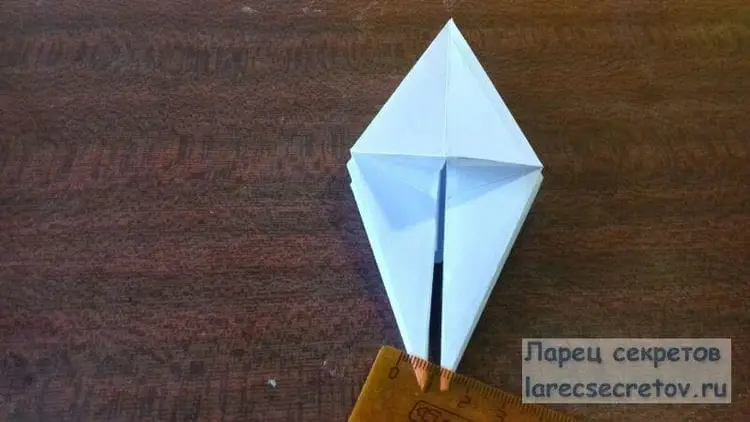
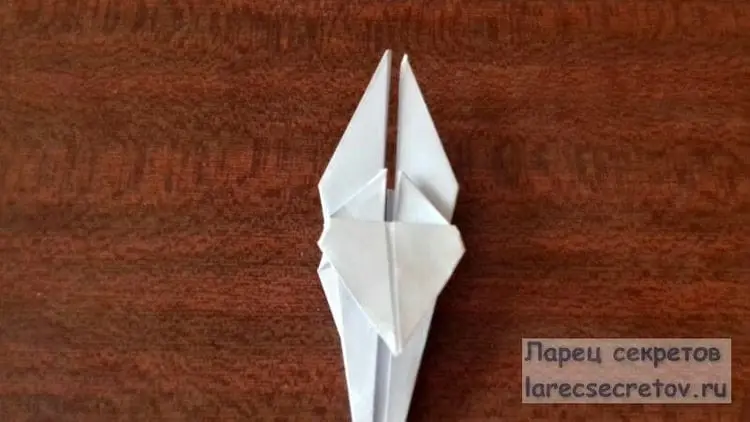
Next, bend the tips of the large figure to the middle.
Let's outline the outline and bring them back. And again we will clean them inside. There should be one fold inside. Why so many folds? With them it is easier then to form the part.
Hurrah, we did it. Bring the triangle back down. We repeat this procedure with other parties. Next, we arrange the craft with branches up.
Open with straight sides. We bring the sides of the corner to the middle.
We fold and close them.
Where we do not touch the triangles. We're coming to the final. We need sides with curves.
We take the petal by the top and lower it down to the base.
We repeat the same with the rest of the details. Let's make them curly with a pencil. The bud is ready. Prepare the stem with leaves. Let's put all the details together. Lily is ready.
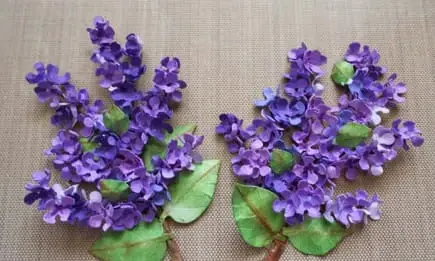
Lilac bouquet
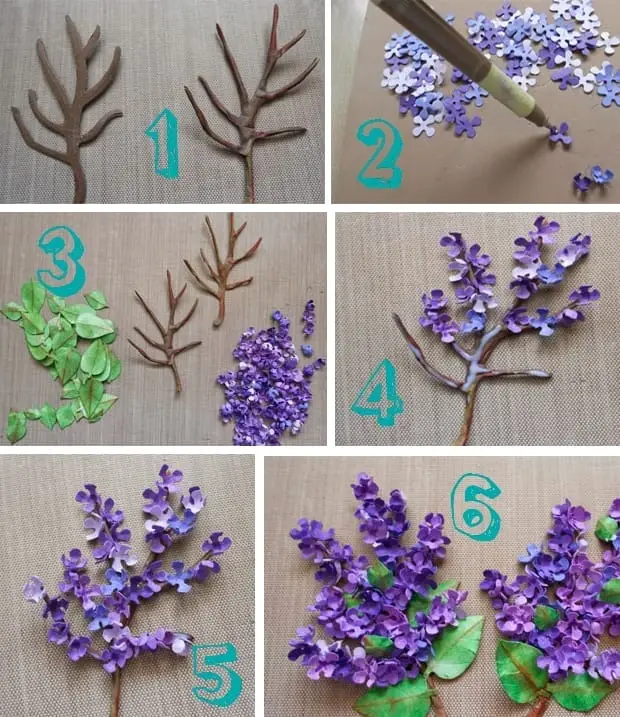
What you need to prepare: brown thick paper, scissors, glue, a flower-shaped hole punch, purple paper in different colors, green paper, a brown pencil, a quilling tool with a ball on the tip.
We cut out the outline of a branch from brown paper, push it from the back side with a quilling tool with a ball at the end. Using a figured hole punch, we prepare the flowers, and push them through with the same tool. We glue the flowers to the branch, as well as green leaves.
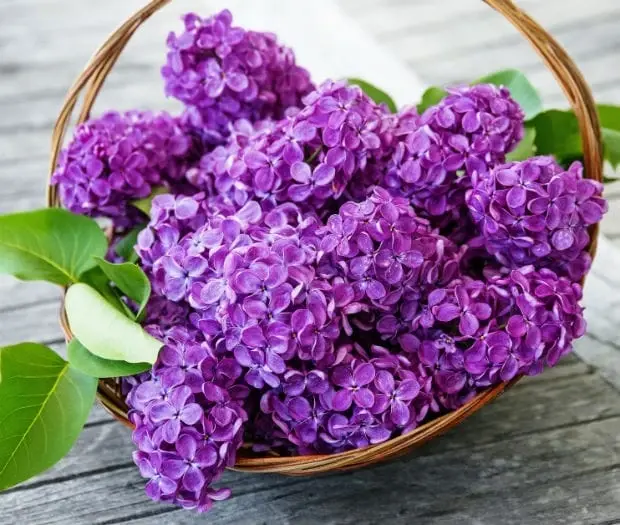
Real lilac.
Crepe paper daisies
Suitable material: white crepe paper, scissors, yellow paper, glue.
You will find the steps for creating this chamomile in the video:
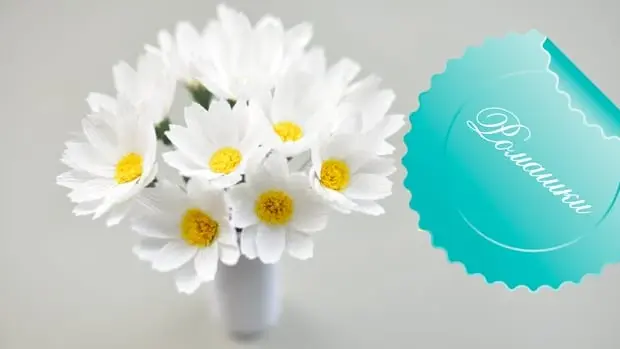
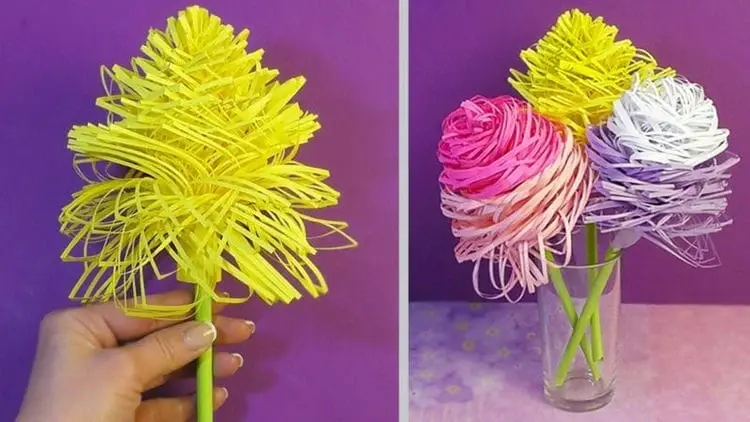
Original flowers from a glossy magazine
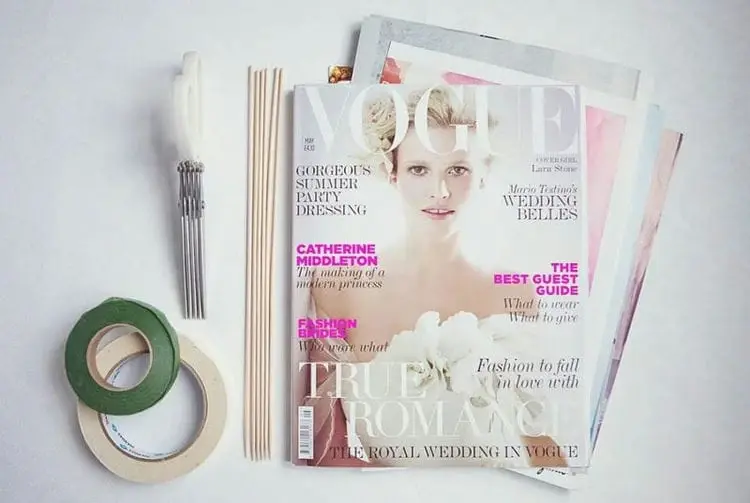
You can give a second life to old and unnecessary glossy magazines by making flowers out of them. To make an original craft you will need:
- magazines;
- skewers;
- PVA glue;
- special tape for flowers;
- scissors (or chopper scissors to create multiple cuts).
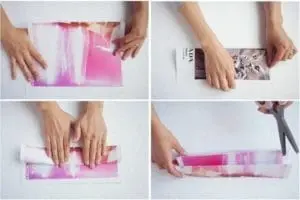
Preparation method:
- Cut or tear out magazine pages in matching colors.
- Fold the magazine sheet vertically into three folds.
- With scissors along the entire length of the sheet, but only on one side, many strips are cut about 0.5 cm wide, without cutting through the sheet to the end and leaving 1 centimeter to the edge.
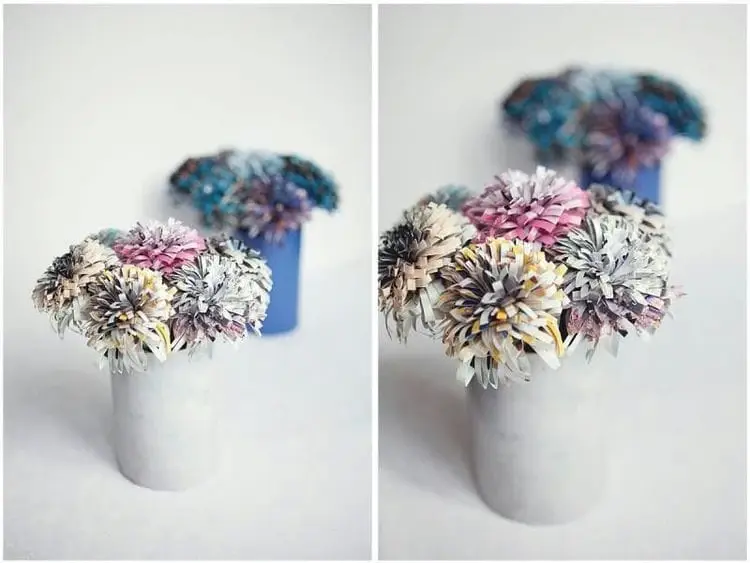
- Then they take a wooden stick (skewer) and fix the cut page from one edge. Start rolling the paper onto the skewer.
- The base of the bud is formed with a floral tape and wrapped around the entire stick-stalk.
Such flowers from magazines look beautiful and original in a bouquet in a vase.
When you want to cheer yourself up or create a cozy romantic or festive atmosphere, paper flowers will come to the rescue.
Some craftsmen are so skillful at making paper flowers that flowers can look better than real ones. They will help to make a boring interior original, beautifully congratulate you on the holiday and make this world a little more beautiful.
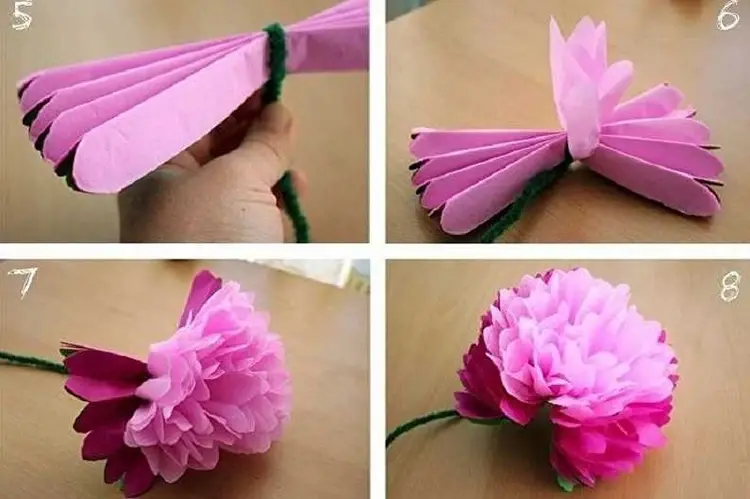
How to make easy paper flowers in 5 minutes
Paper flowers are the perfect addition to holiday decor (or even kids room decor!). The only problem is that they are labor intensive. But the author of this project figured out how to simplify the manufacturing process. These simple paper flowers can be made in 5 minutes or less if you make a small assembly line then a whole bunch can be made in an hour.
 ](
](%5B!%5B%5D(https://allforwomen.com.de/wp-content/uploads/2022/01/post-516674-61e9c39115400.webp)
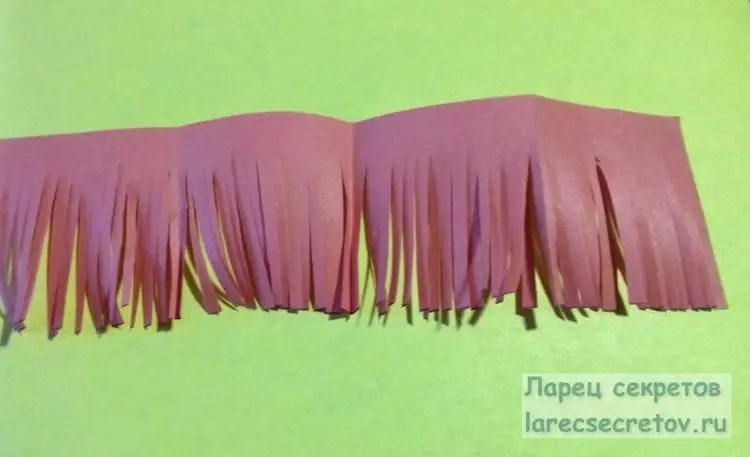
First cut a strip of corrugated paper 10 cm wide Cut six petals or make a template. Then cut out two circles – a 4 cm circle and a 5 cm circle. Wrap the pom pom with a cloth and fix the hole with hot glue. Prepare two or three sheets of crepe paper. Fold all these elements – first glue two circles with a fringe. Then a pom-pom in the center of the circles. Glue the petals one at a time to the back.

Add leaves at the end.
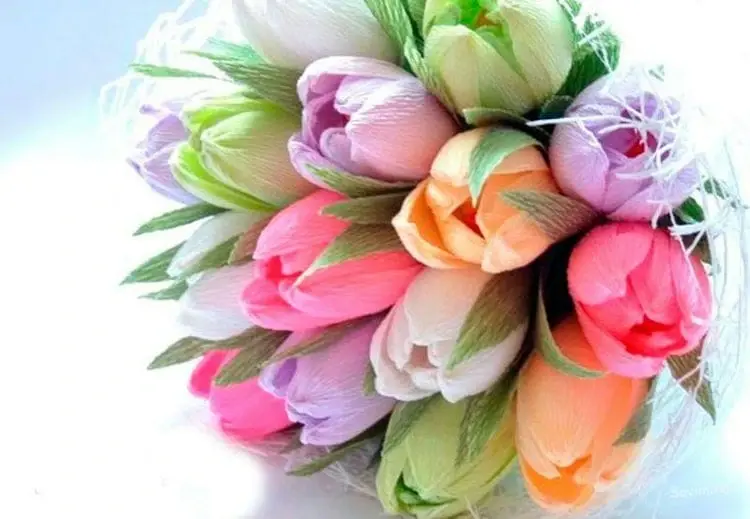
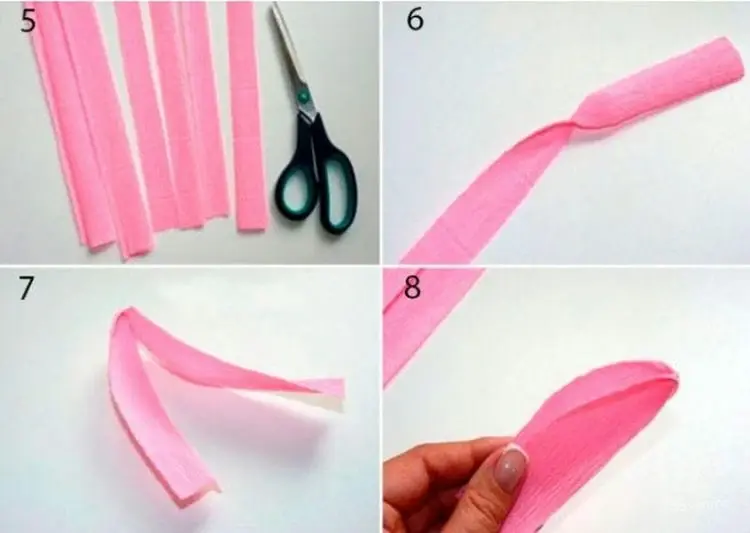
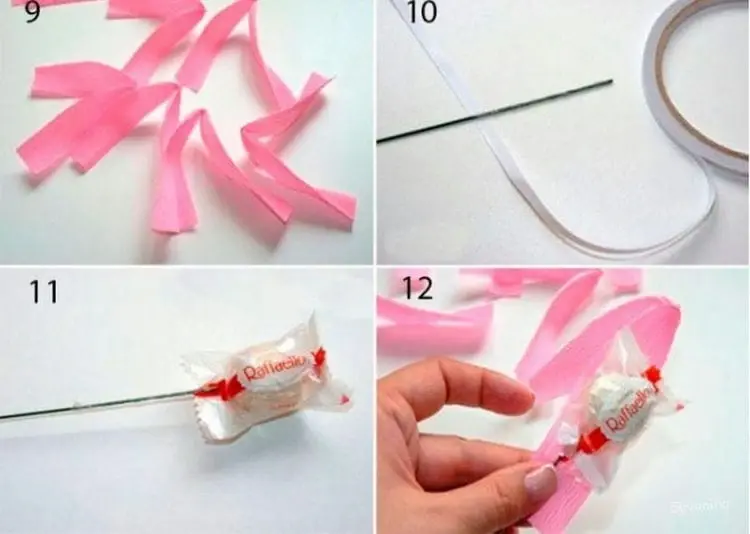
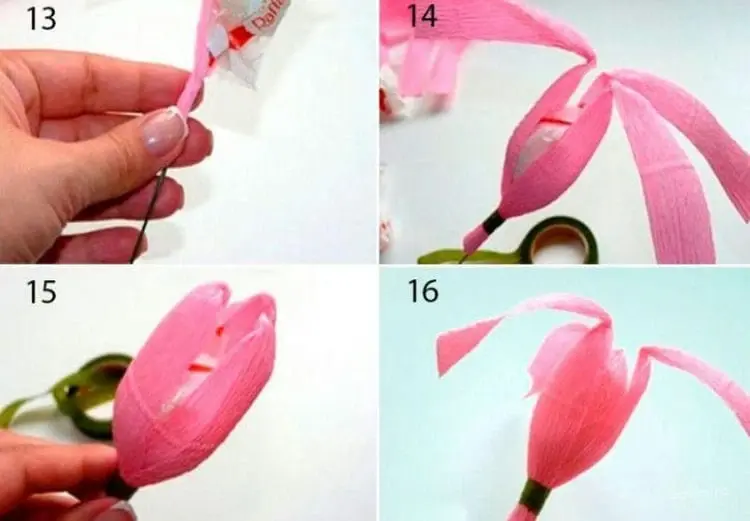
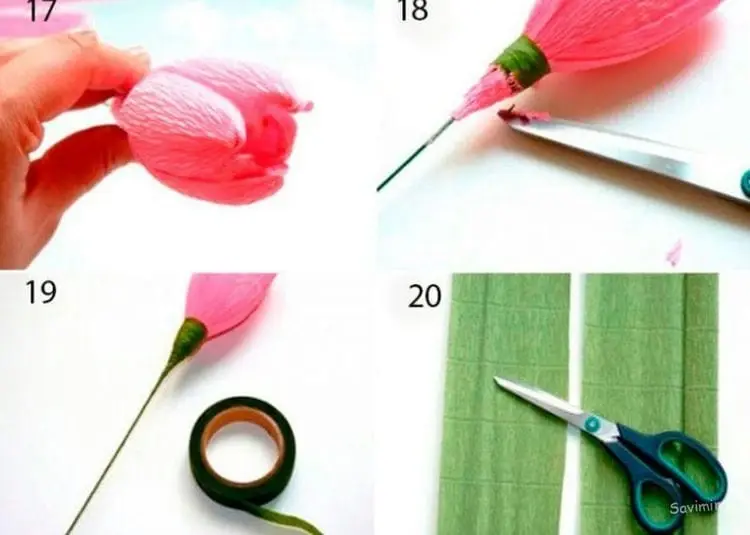
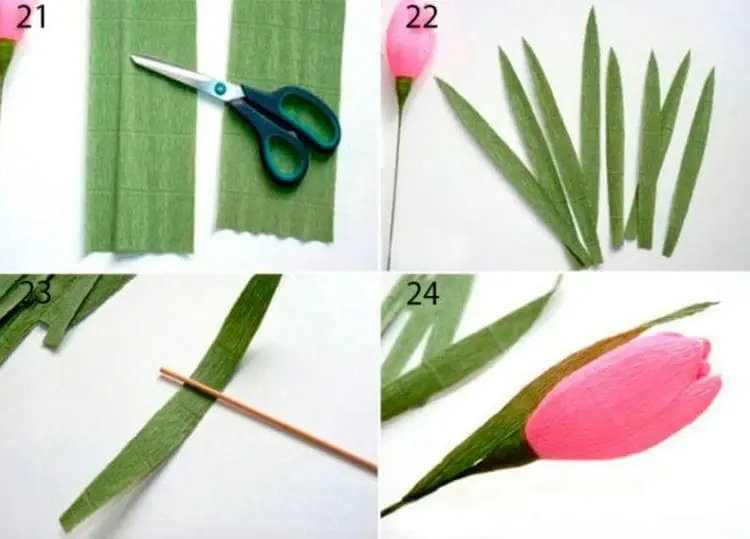
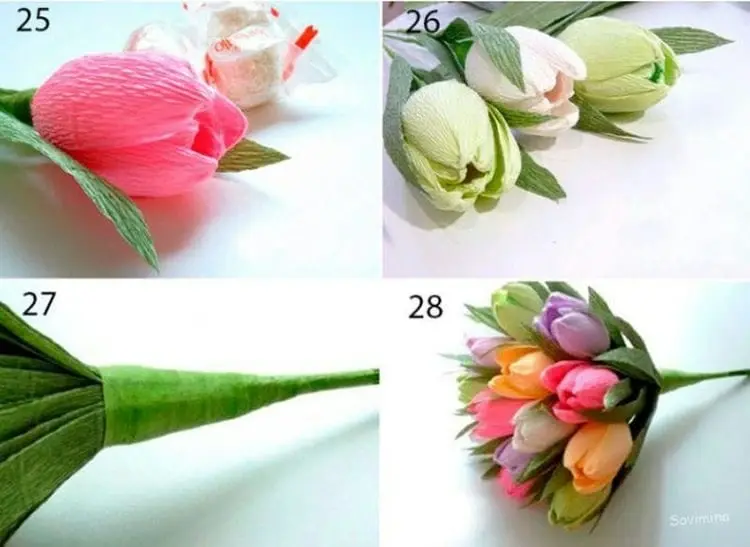
Paper flowers with candies
Decided to present flowers and sweets as a gift? And why not combine it and give a candy bouquet? Looks very original. And such a present can please the recipient for a long time with its beauty and sweets. Moreover, some flowers can be made so that you can easily remove the candy without damaging the petals. Let's try to learn how to make such a wonderful gift?
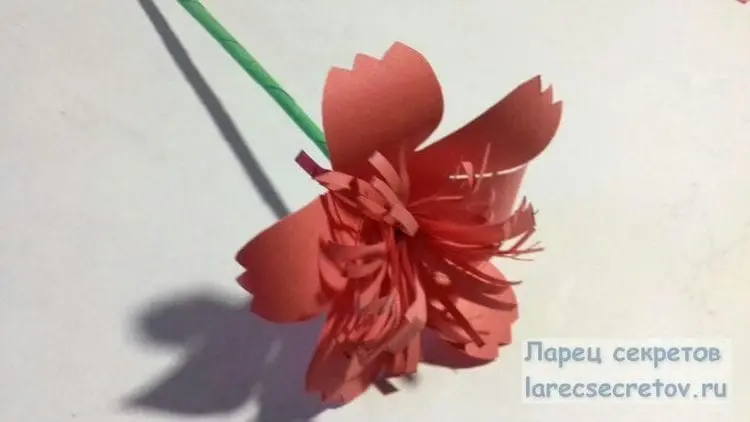
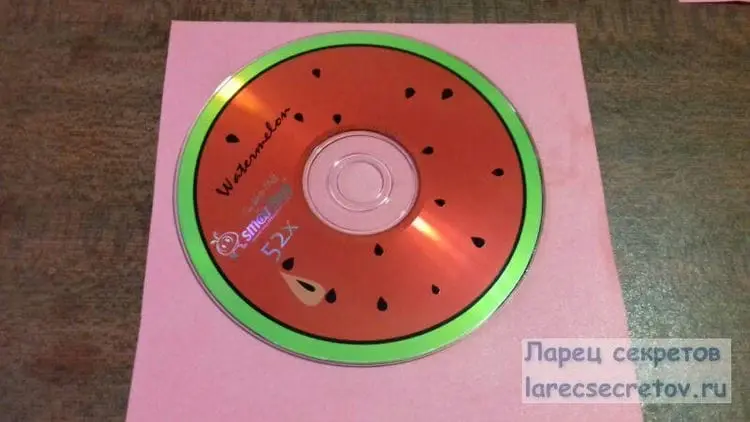
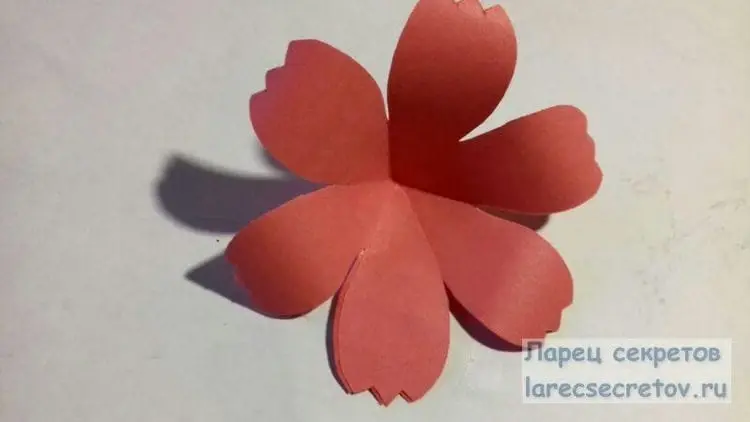
Scarlet flower – a simple craft with children
Such a flower is made easily, simply and quickly. And very good for crafts with children.
You will need:
- colored paper
- scissors
- pencil
- thin needle
Progress:
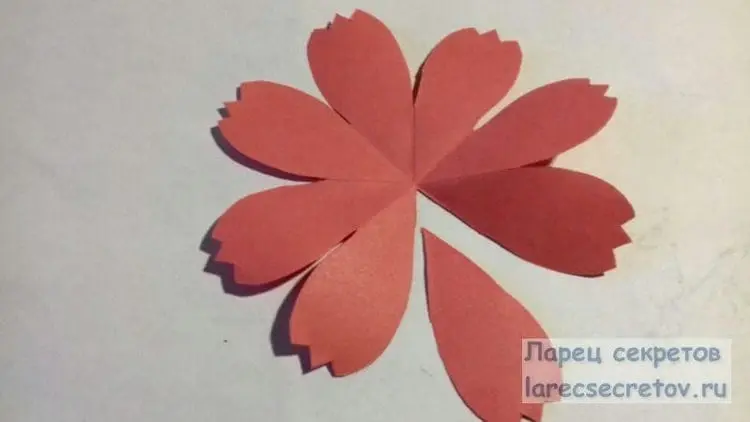
We make a circle with a diameter of 12 cm. Cut it out.
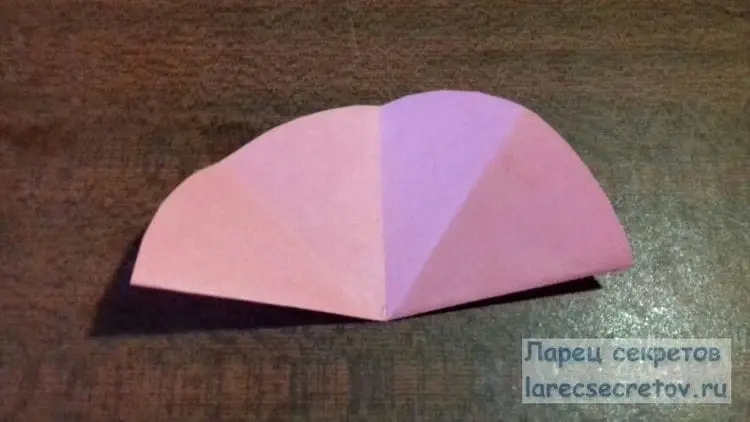
Fold in half 3 times.
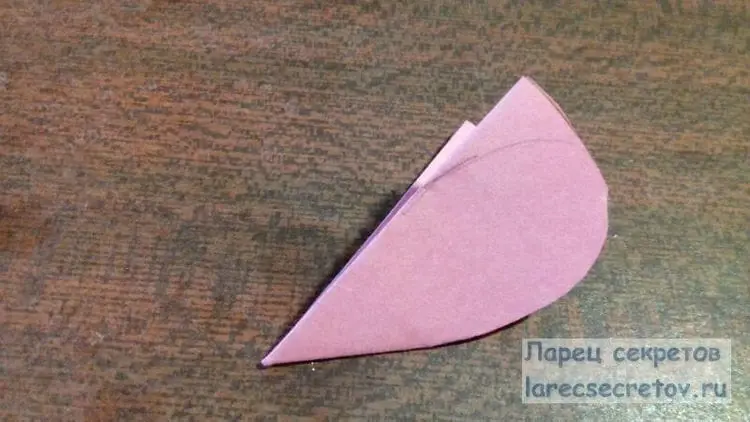
Then cut corners and round.
Expand and get a flower.
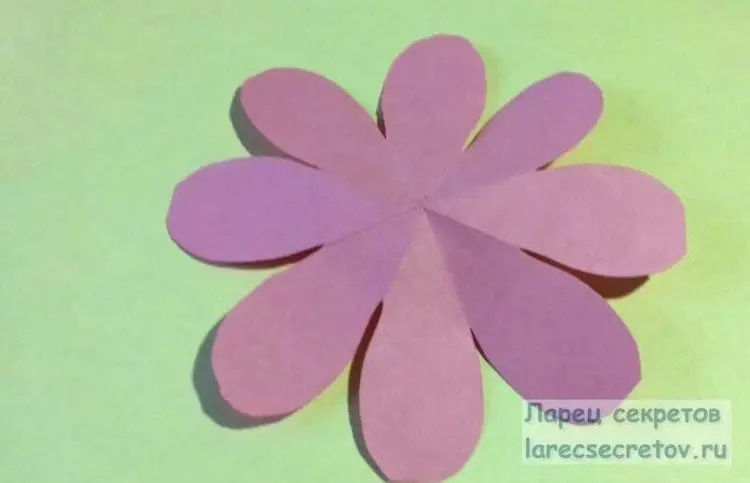
Let's make its edges more openwork.

Next, take a strip of the same color measuring 5x17cm. Fold it in half lengthwise twice.

We make cuts along the width of the tape (without cutting to the edge of 1 cm).
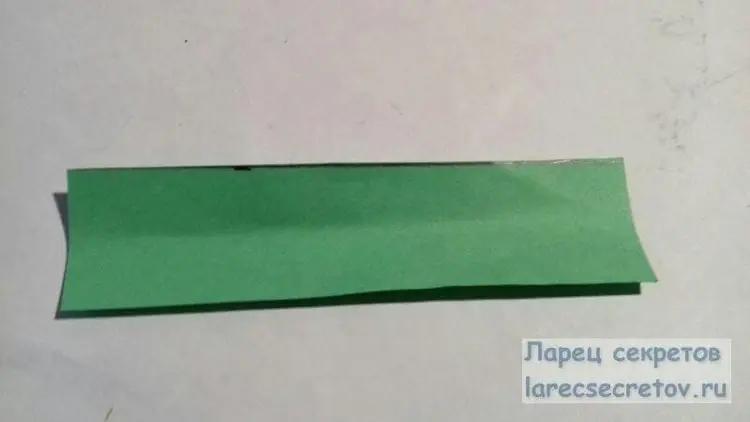
Now we will prepare a green ribbon measuring 4×20 cm.
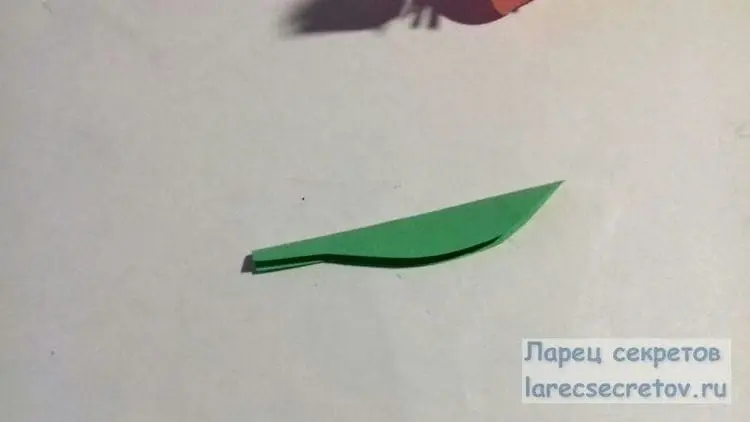
From it we will make a stem. We coat the strip with glue and wind it on a knitting needle. Then remove the needle and wipe it with a damp cloth. Glue the fringe to the stem.
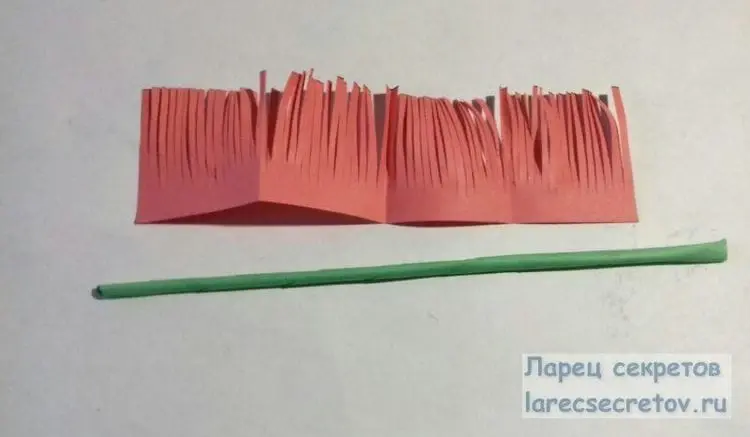
We coat the uncut edge with glue and now we wind it on a stick.
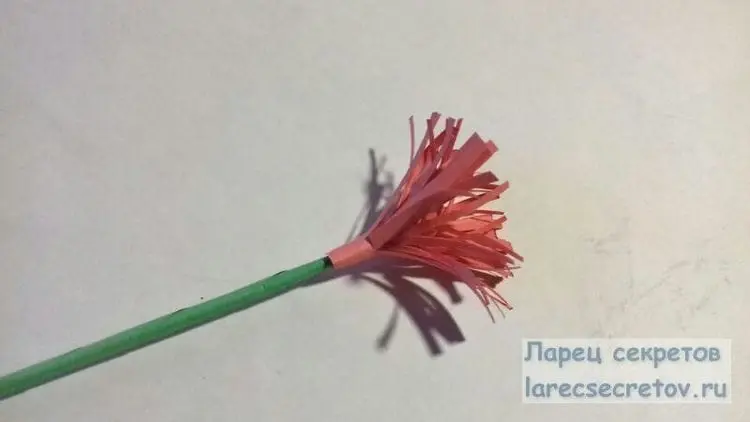
We cut off one petal from the flower, glue the extreme ones,
so we give a natural shape to the bud.
We turn the workpiece upside down, cut off a corner from it.
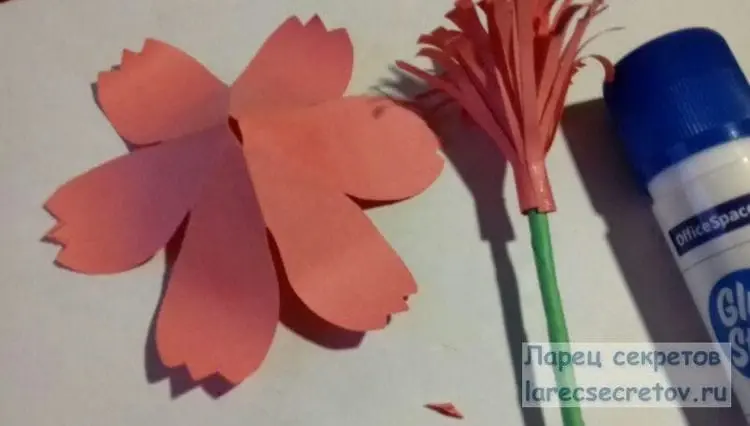
Then we insert the stem from above into the bud and glue it. We just have to attach the leaf to the stem.
Cut out the leaf and glue it to the base.
You can make different colors. You will get a wonderful bouquet for a gift on March 8 or for decorating a room.
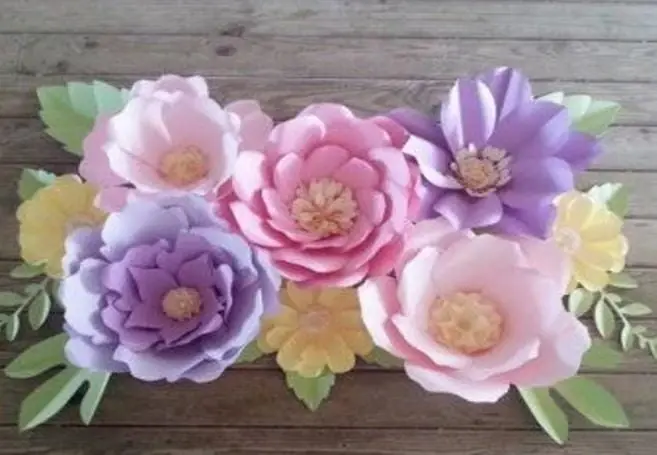
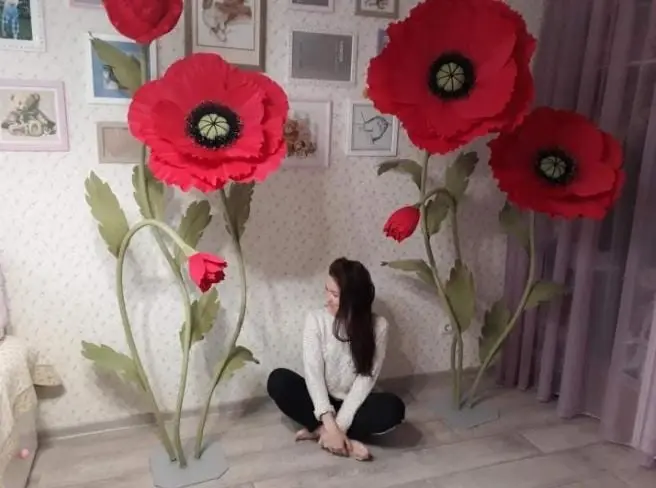
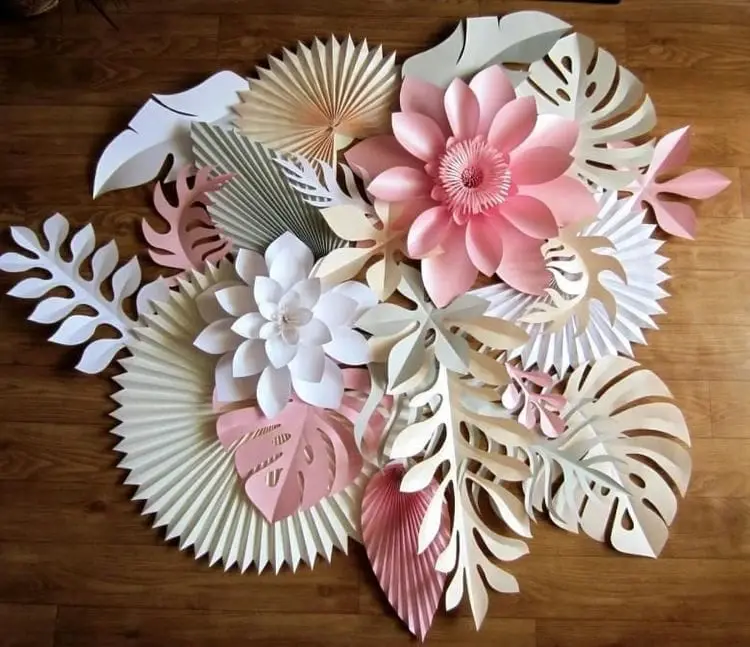
How to make paper flowers with your own hands to decorate the hall and on the wall (templates inside)
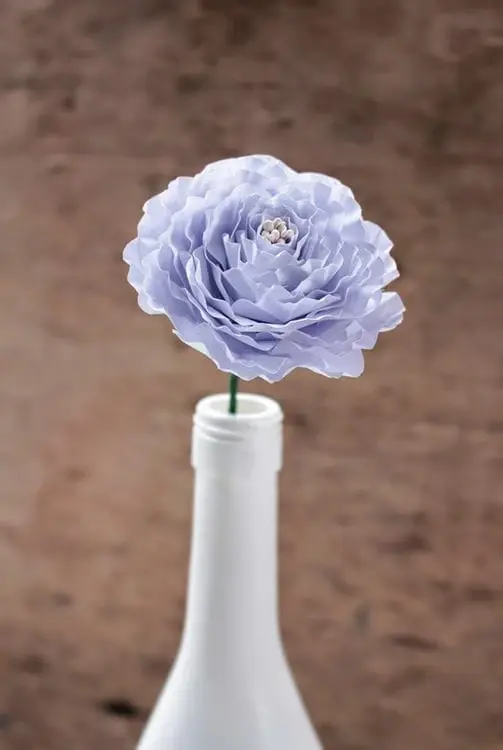
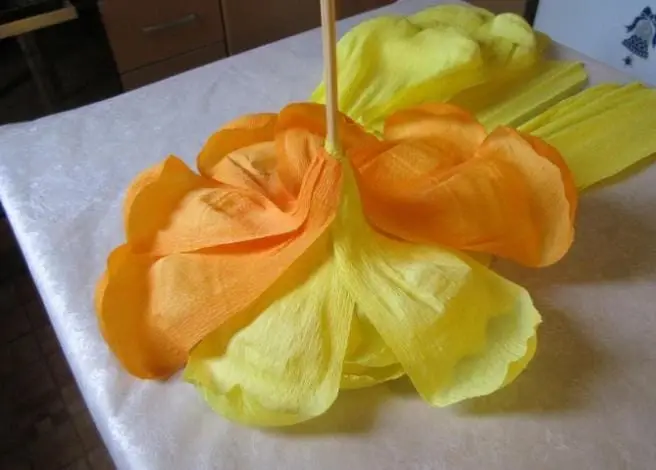
Everyone heard about growth flowers? Today they are often used for decorating events and photo shoots. I could not pass by this topic and decided to share with you such a wonderful master class.
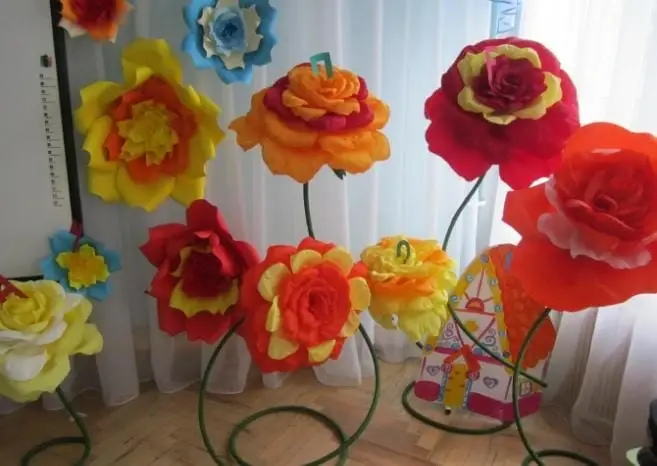
You will need for 7 pieces: 7 rolls of multi-colored corrugated paper + 1 roll – green; metal-plastic pipe 12 m long; 7 wooden sticks; glue gun; 7 packs of glue sticks; scissors.
Manufacturing process:
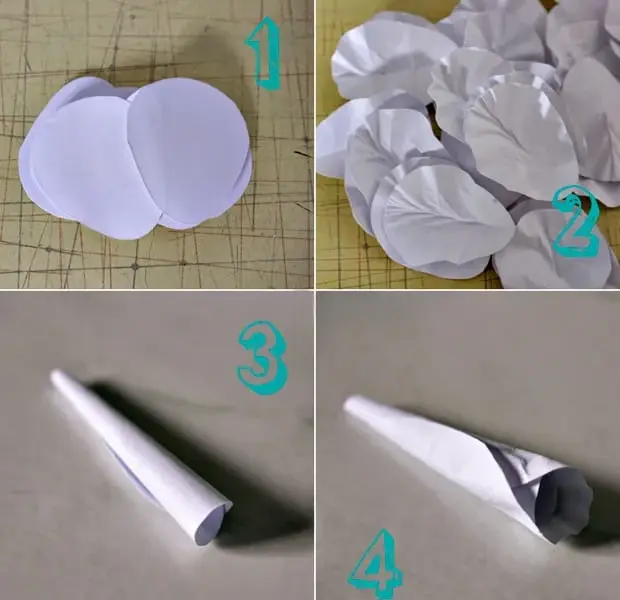
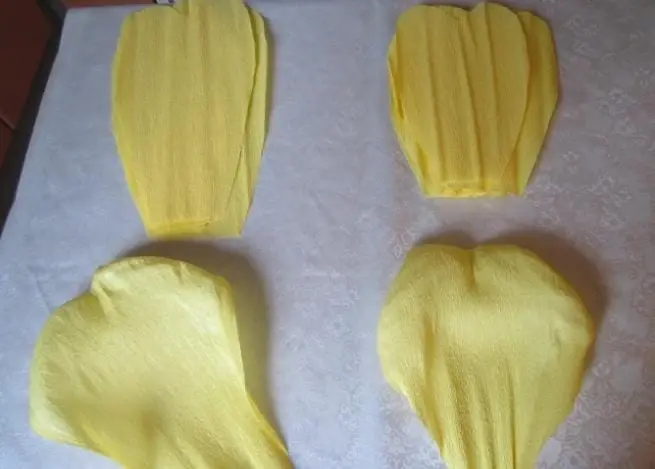
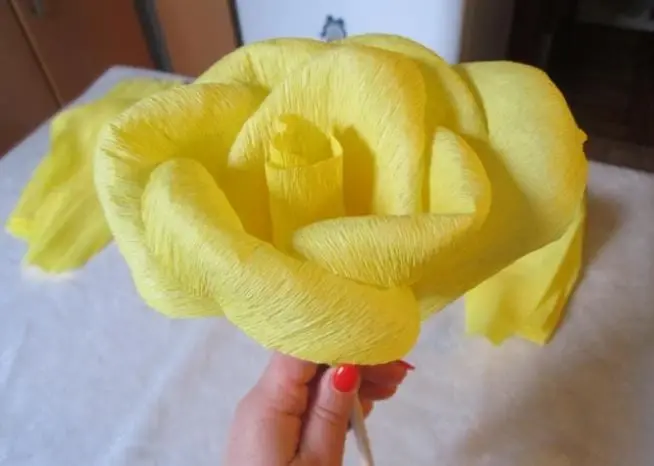
1 Cut out petals of four different sizes from corrugated paper. For the middle of the inflorescence, you can use a different color – it will turn out more interesting.
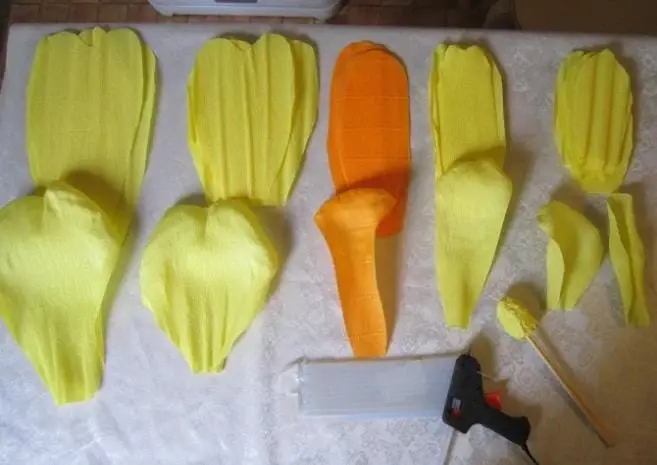
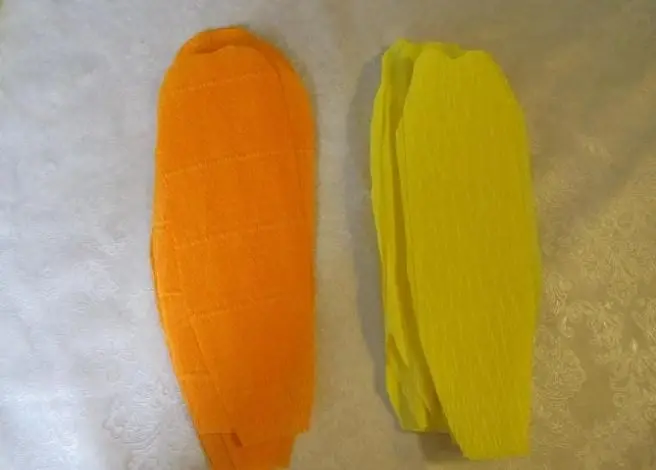
2 We stretch the petals with our hands, giving them the desired shape.
3 We stretch everything – both large and small.
4 Their shape may be different, that's okay.
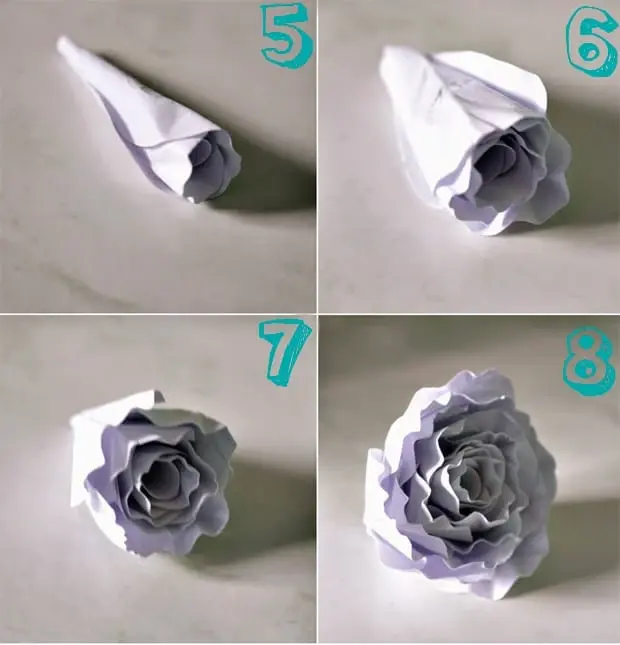
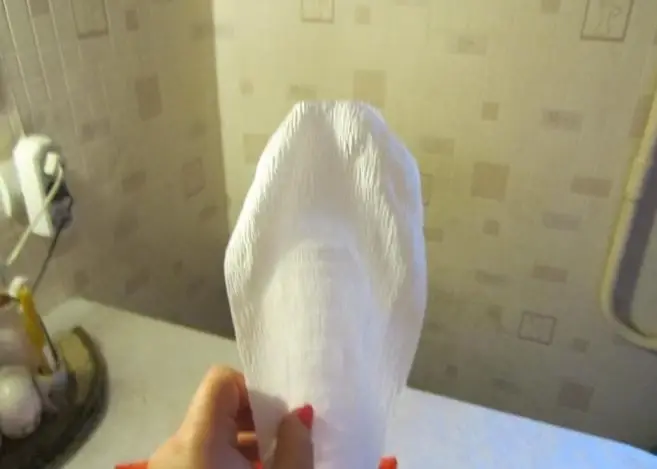
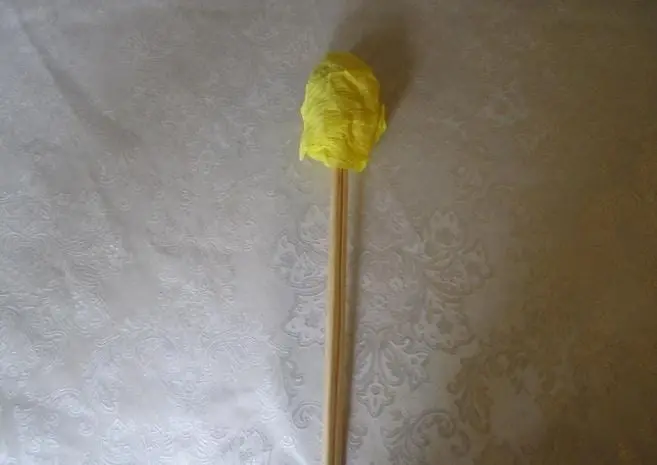
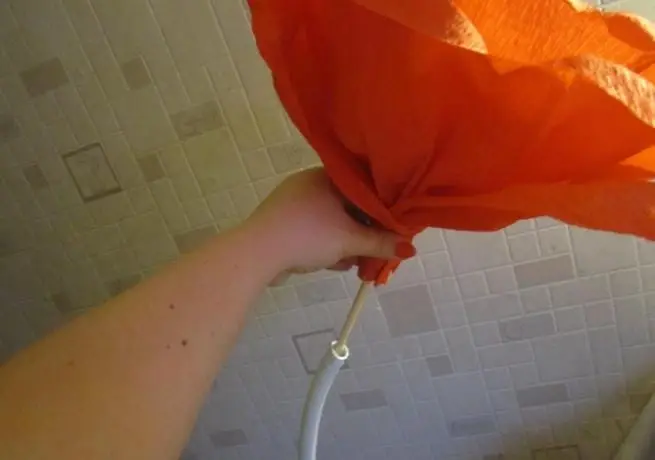
5 Now you can collect the flower. First we make the core. To do this, glue a piece of paper on a wooden stick. Like this.
6 We wrap it with petals. We fix each petal with hot glue at the base.
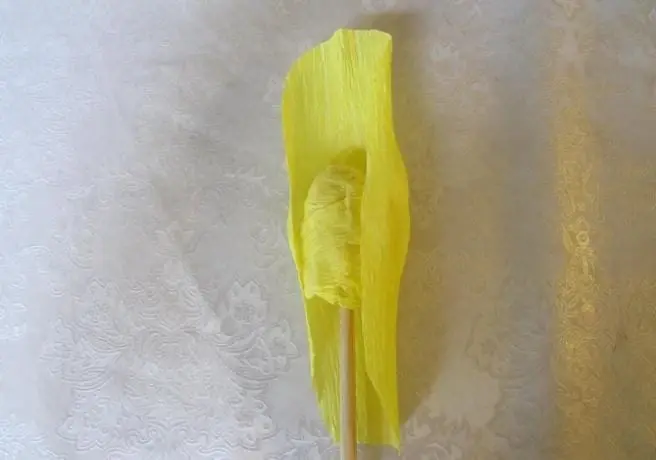
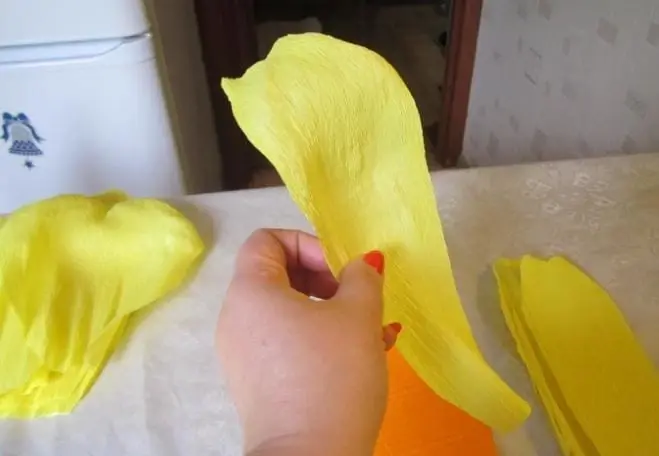
7 Here's what happens.
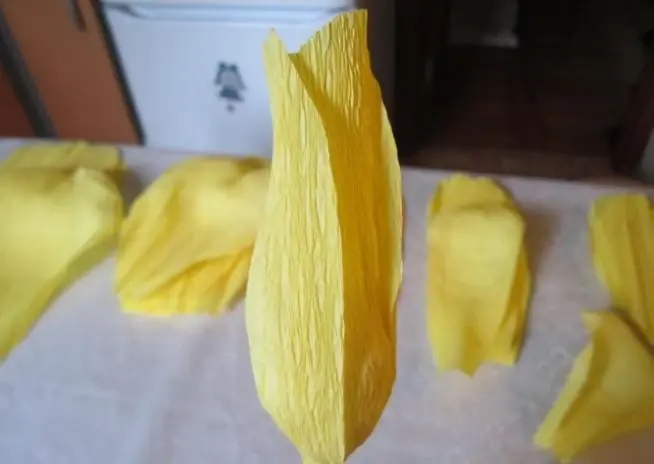
8 Do the same with the rest of the petals. You can twist them in different ways – as you like more, see for yourself.
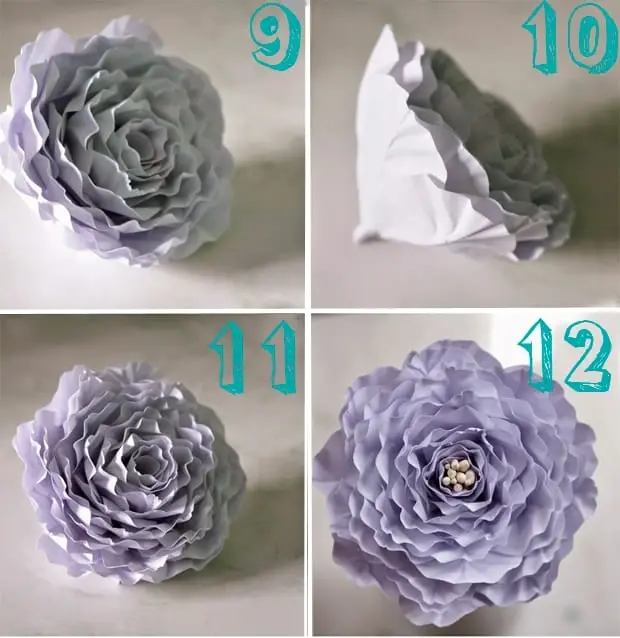
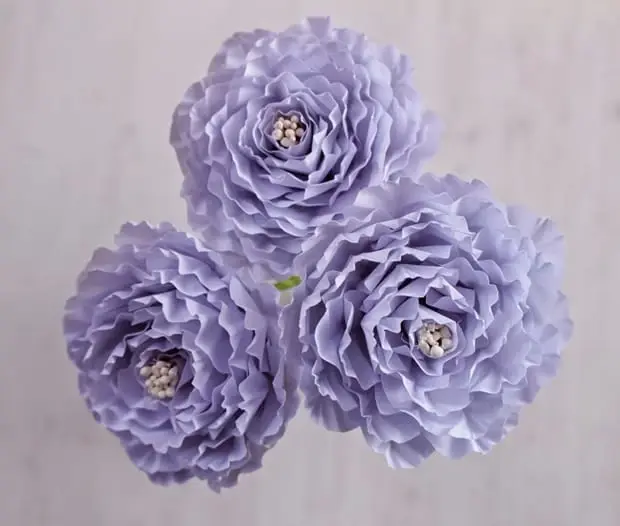
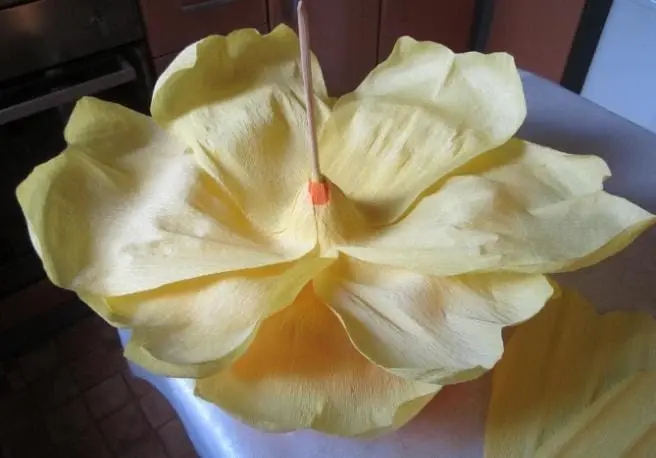
9 The smallest petals we needed 10.
10 Petals larger – 8 pieces.
11 In the last stages, to make it more convenient, the workpiece can be turned over and work like this.
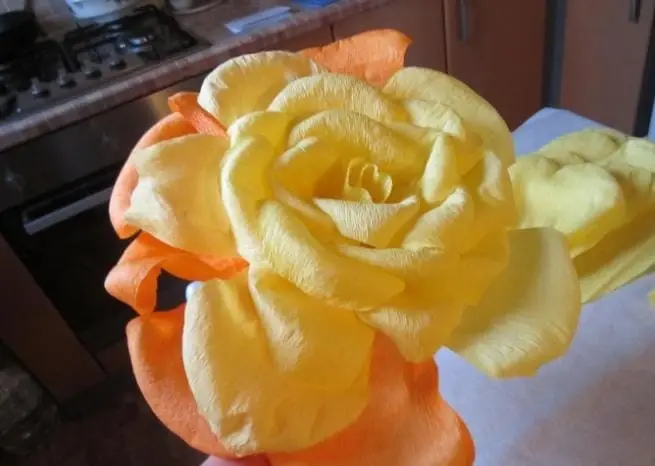
12 We glue the largest petals.
13 It is better to use hot glue, not PVA: this way you will spend less time and be sure of the reliability of the result.
14 Cut out 5-6 leaves from green paper.
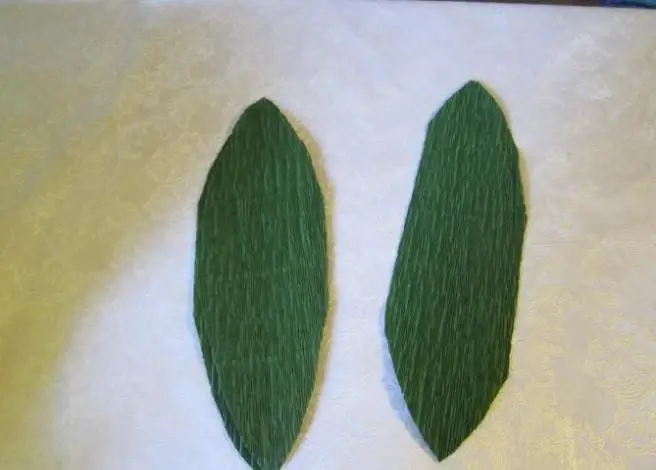
15 We make sepals out of them.
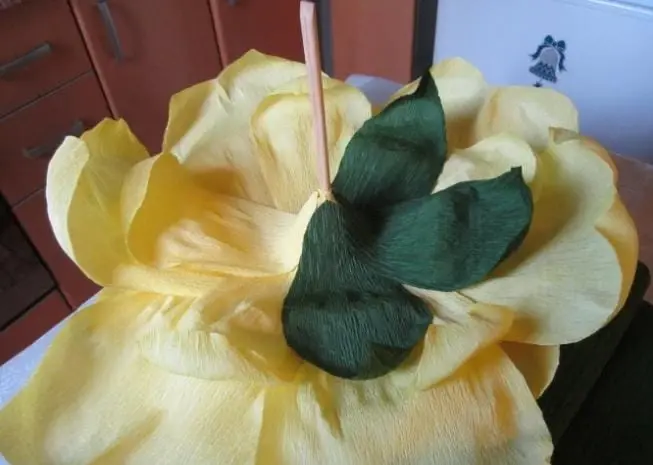
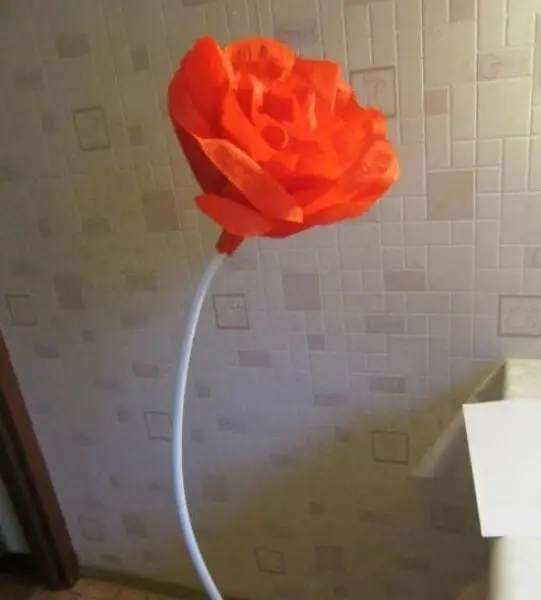
16 Done!
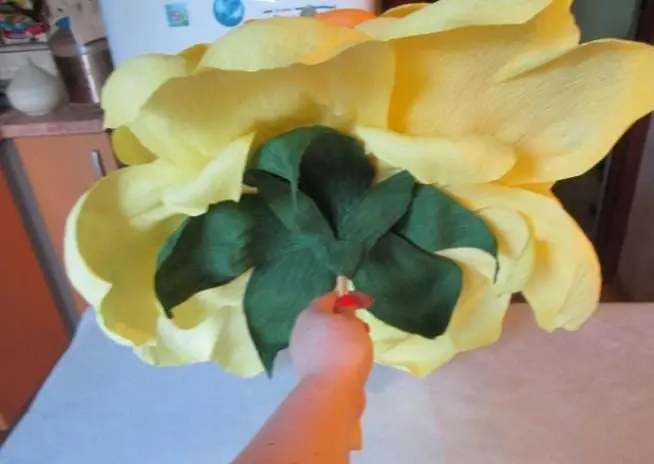
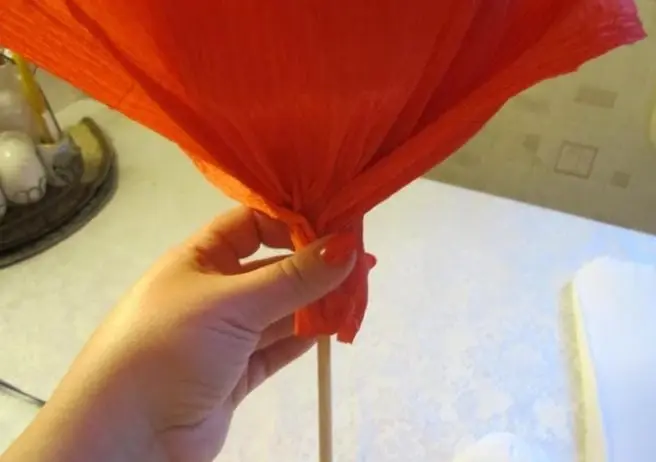
17 We cut off a piece of metal-plastic pipe and give it the desired shape with our hands.
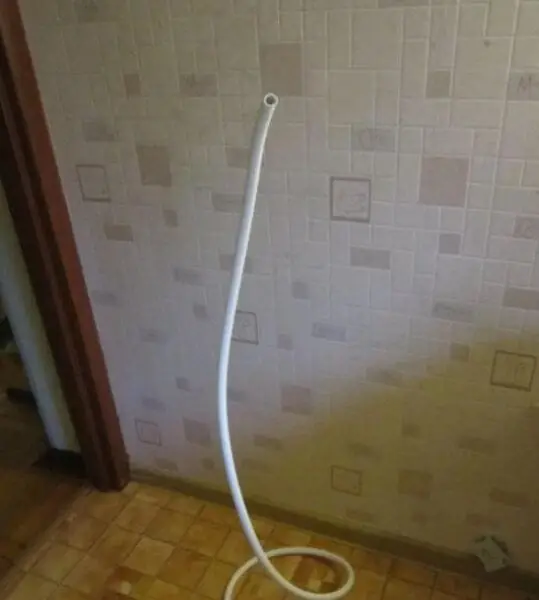
18 We insert our product there and fix it with glue.
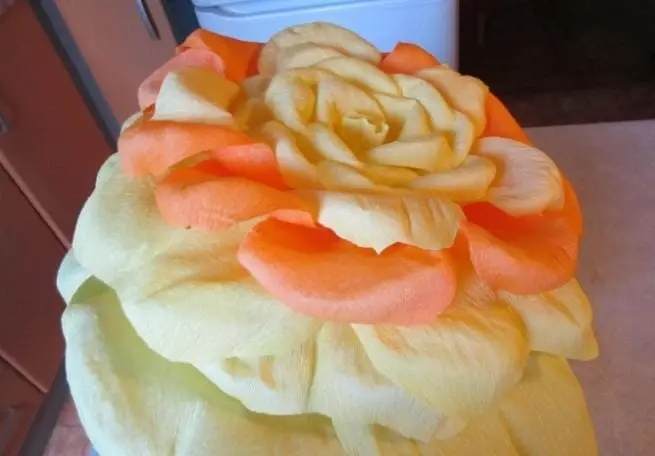
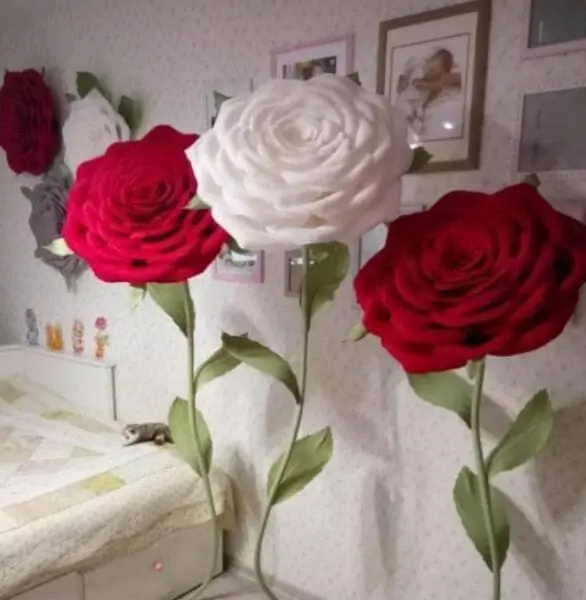
19 Decorate the pipe with green paper. These are the different decorations you can make with this step-by-step guide. You can make flowers without a stem, and then they are suitable for decorating walls.
20 Double flowers can be made from a long pipe – this also looks very unusual.
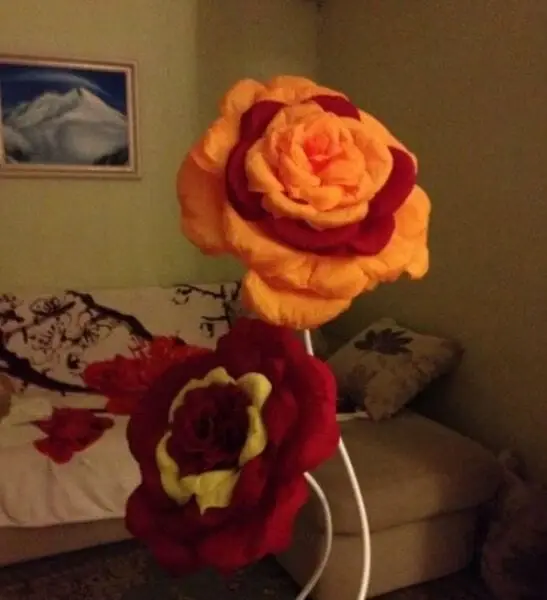
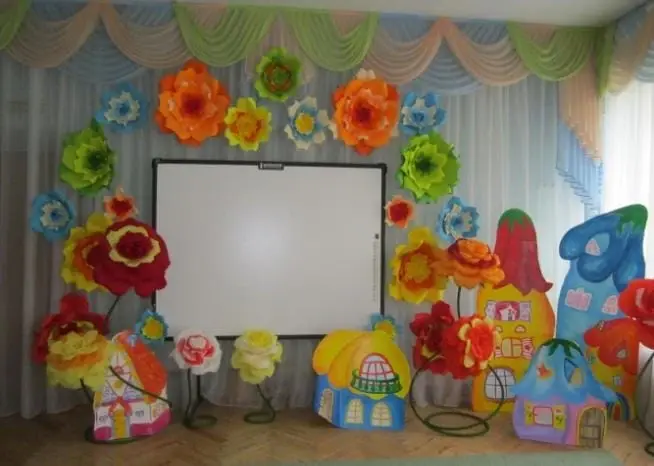
A few examples of the use of such decorations.
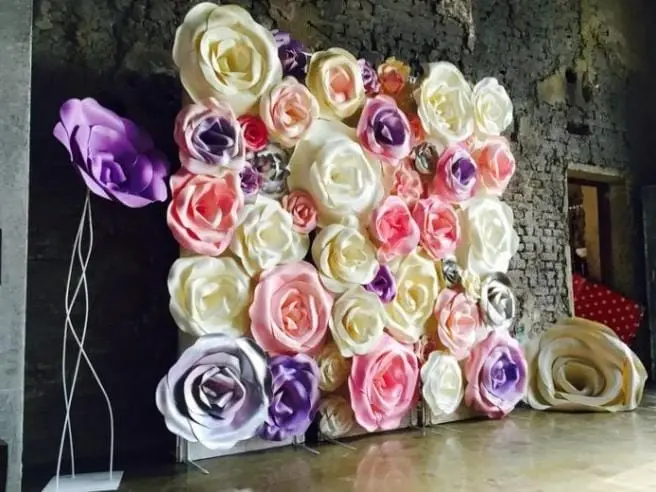
Would you like to have a couple of these at home?
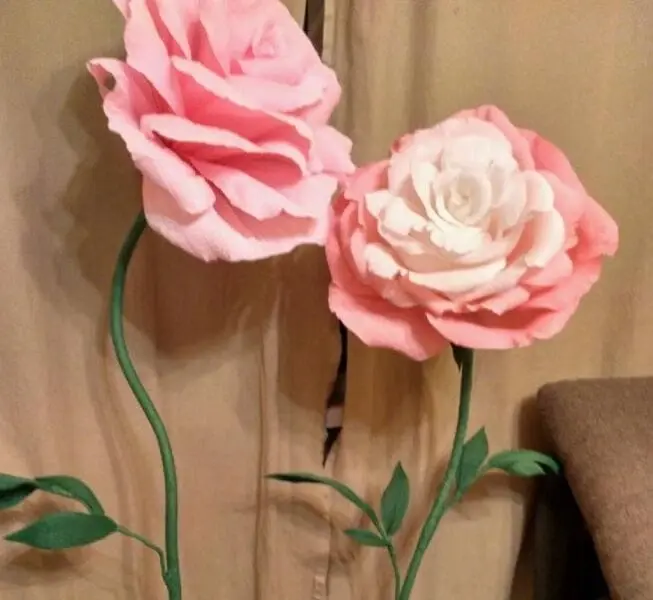
I think it turns out very nice.
And most importantly, it is not as difficult to do as it seems.
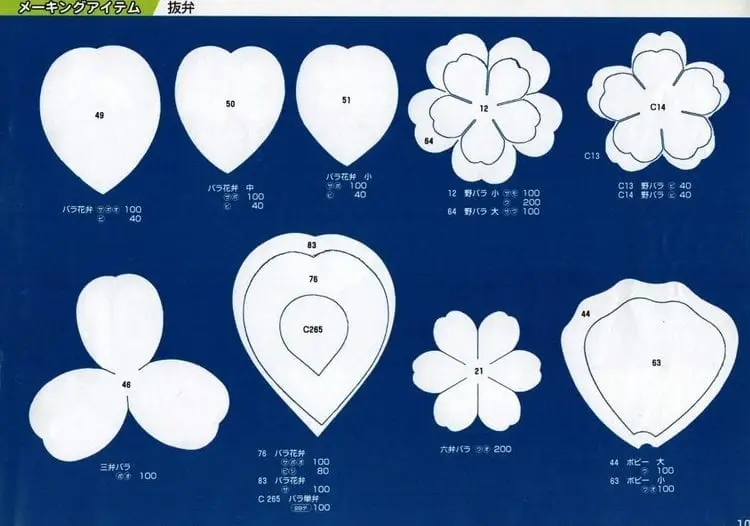
Paper flower templates and schemes for beginners
You can find simple options in these templates for beginners. The volume of flowers can be achieved by layering, which can be created according to schemes from pre-cut blanks of different sizes. It is enough to cut them out of any colored paper and decorate as you wish. You can put one on top of another in different formats and make voluminous flowers, or as an appliqué. Everything is very simple. If you don’t have a printer or don’t plan to print, then you can attach a sheet of paper, after enlarging the downloaded image and carefully circling it around the outline.
Light bouquet
Theoretically, you can collect a bouquet of almost any paper flowers, which are easy to put on a skewer with glue or secure with wire.
Multi-colored spiral roses on wooden sticks or even on tree branches, to which green leaves are attached, are perfect for a light bouquet.
It would be nice to arrange different flowers in a bouquet, made in a simple technique, and add artificial grass to them.
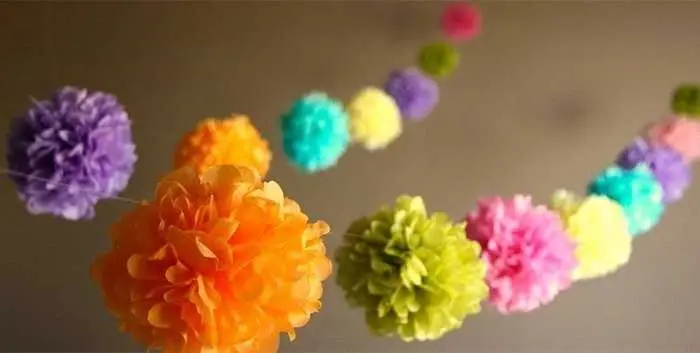
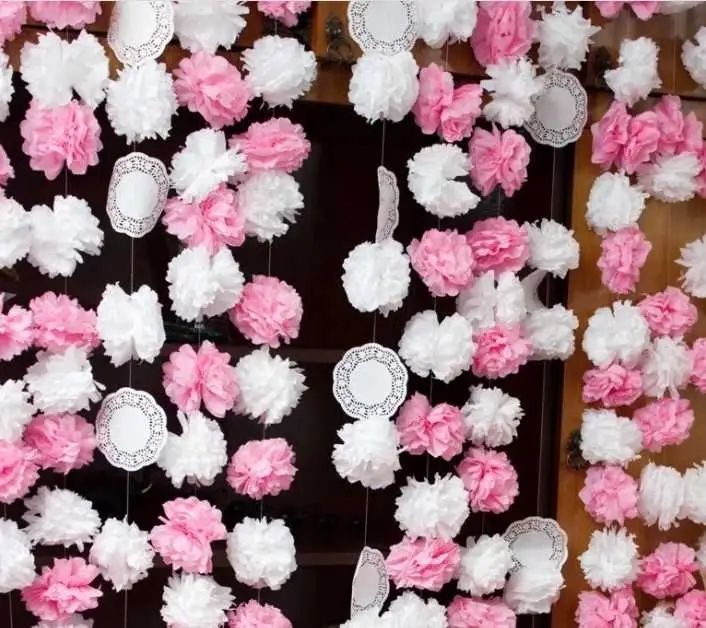
Paper flower garlands
It is not at all difficult to make a bright and spectacular garland with your own hands to decorate a room for some event.
To work, take a beautiful A4 colored paper, fold it in half three times, then open it and collect an accordion from this sheet, evenly ironing all the bends. In the center, fasten with a stapler twice, then bend in half and cut a triangle at the top end.
Open, then connect the upper and lower edges, fastening them with a stapler. Thus, the element of the garland turned out, make several of these pieces.
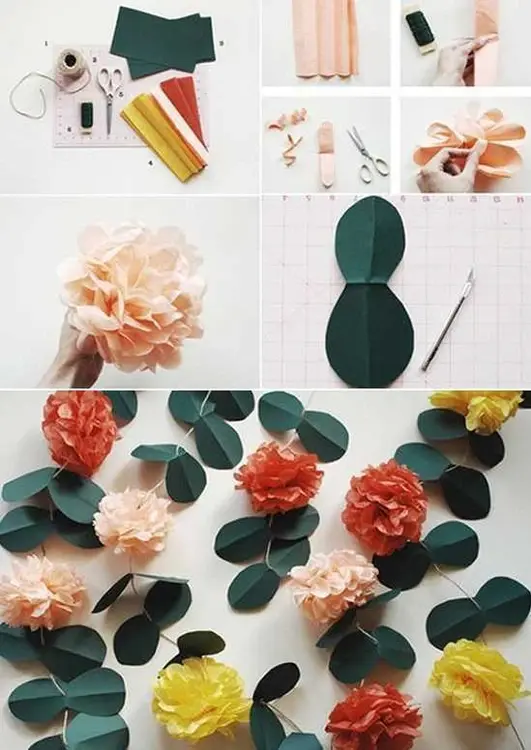
Next, take a hole punch, punch a hole in the upper extreme petals and insert the threads.
