Do-it-yourself shabby chic crafts: photos and videos of shabby chic techniques
To start making crafts in the shabby chic style with your own hands, you need to prepare special clay, a cotton base, get stacks, teip tape, special molds made of plastic or metal, and other necessary tools. The video of the master class, photos and detailed instructions below will help you get a beautiful, stylish product.
Materials and tools for crafts in the style of shabby chic
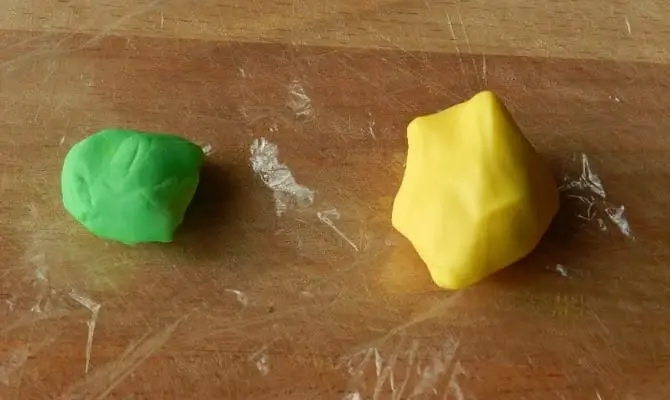
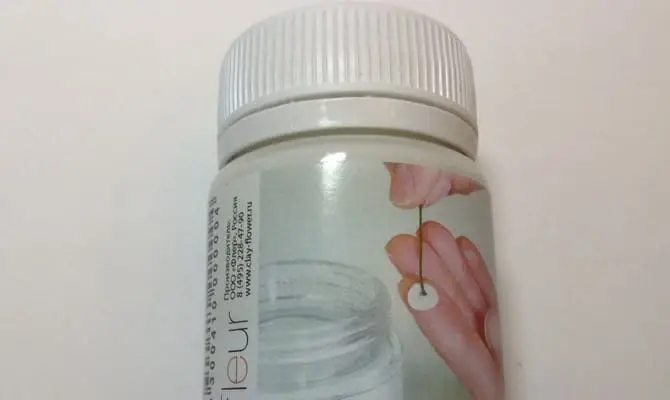
1 Self-hardening floral polymer clay (Modena or any equivalent – Modern, Fleur, Daisy, Thai Clay, etc.).
Modena – Japanese-made clay, white, very soft and plastic in modeling, rolls out as thinly as possible without cracks and breaks. This is an ideal material for shabby chic, it is well painted with oil paints and is washed out with water at the joints without traces. Modena flower petals retain some flexibility and resilience after complete solidification. An open pack of plastic should be stored in an airtight container, tightly wrapped in several layers of polyethylene. It is necessary to exclude air access and avoid heating and direct sunlight, otherwise the clay dries up and loses its original properties. Similarly, during modeling – clay should be wrapped in polyethylene as soon as you finish working with it.
It is worth noting the fact that cold porcelain is not a frost-resistant material and with prolonged exposure to temperatures below -10 ° C, it begins to harden, crack, become brittle, lose its plasticity and elasticity. It is very difficult to work with such frozen polymer clay – a piece of plastic almost immediately begins to crumble in your hands. In this situation, you can try to revive the clay by kneading it in small portions with water and a fat cream.
There is also a recipe for making cold porcelain at home, proven by many masters. "Home" clay is great for learning and "stuffing your hand." The classic recipe contains ingredients such as D2 PVA glue, cornstarch, citric acid, cosmetic oil, fat cream and whitewash.
2 Dumbbell stacks SS, M.
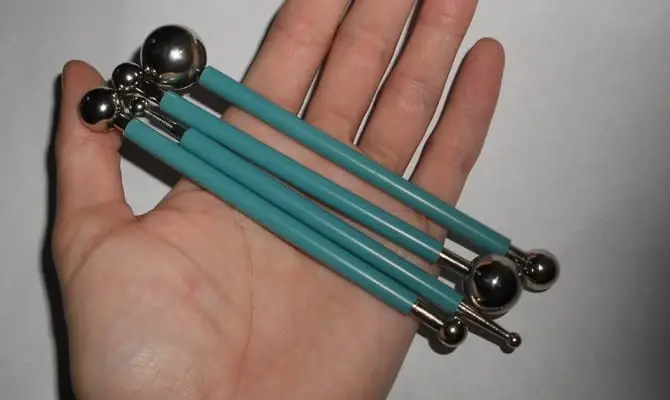
Dumbbell stacks (metal or Teflon, with balls of various diameters at the ends) are used to roll out a thin layer of clay. With these do-it-yourself shabby tools, you can add volume and curves to the petals and leaves, create depressions and dents.
Dumbbell stack sizes are standard:
- L (large) – 1.2 and 1.8 cm;
- M (medium) – 0.9 cm and 1.25 cm;
- S (small) – 0.7 and 0.9 cm;
- SS (super small) – 0.5 and 0.6 cm.
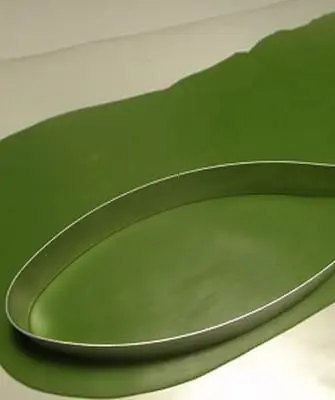
3 Texture molds (rose, rose leaf, universal petal).
Thanks to the use of molds, it is possible to work out in detail the texture of any flowers and leaves. Most of the textures available in specialized stores are made of polyester resin, absolutely firm to the touch; the range represents practically any kinds of plants. The texture of soft silicone molds is somewhat more realistic and thinner: they are flexible and soft to the touch, clay practically does not stick to them, and the print is gentle and neat. At present, self-production of author's molds from silicones and two-component sealants is becoming more and more popular and available.
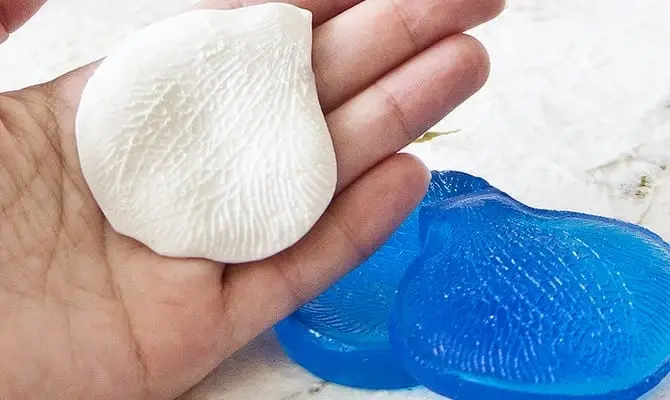
This DIY version of shabby chic crafts will allow you to create a one-of-a-kind mold from any living flower, which is guaranteed to be realistic, durable and easy to use.
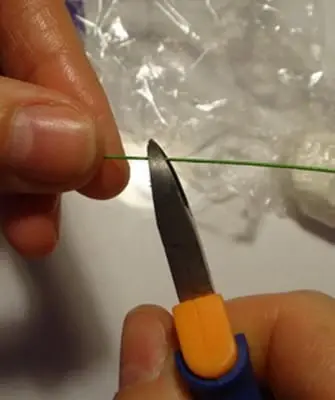
4 Floral wire.
It comes in green and white. It is preferable to take a wire in a paper winding, rather than a painted metal one. The latter is used by florists when working with fresh flowers, in our case, such a wire gives poor adhesion to the clay, and as a result, the flowers can simply fall off the stem.
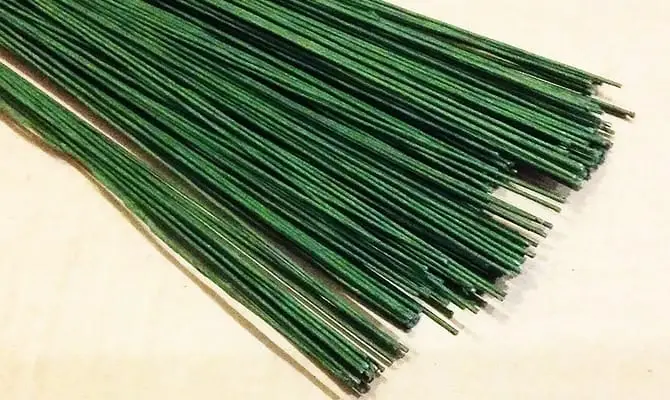
The wire comes in various lengths and thicknesses, most often it is numbered. In realistic floristry, wire number 30, 28, 26,24,22,20,18,16 is used. Please note that the higher the wire number, the thinner it is. So, wire No. 30 or 28 is great for miniatures, sculpting small inflorescences (lilacs, forget-me-nots), as well as for creating stamens, pistils and attaching individual large petals. Accordingly, wire No. 18 is suitable as a base for a stalk of chamomile, gerbera or, for example, daffodil.
5 Pointed stack, main stack.
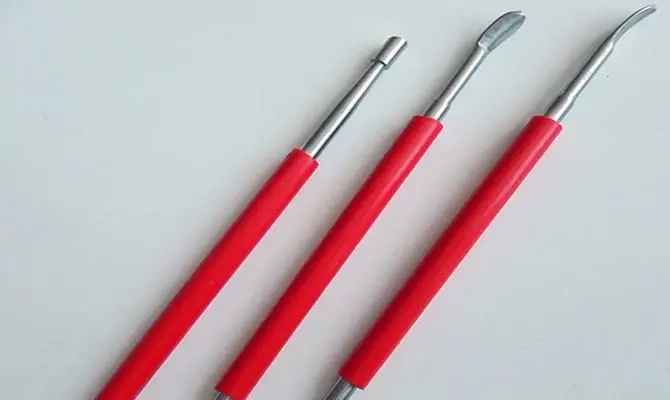
Used for rolling petals and leaves, for applying texture, creating a torn edge, cuts and small holes.
6 small scissors.
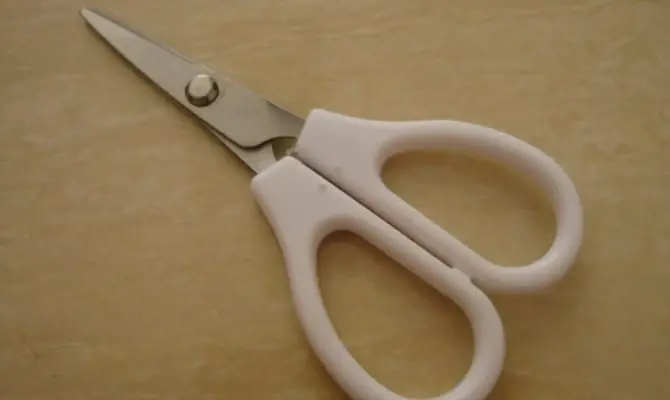
It is better if they are sharp and straight. An indispensable tool in modeling, used in almost every master class.
7 Floral tape (green).
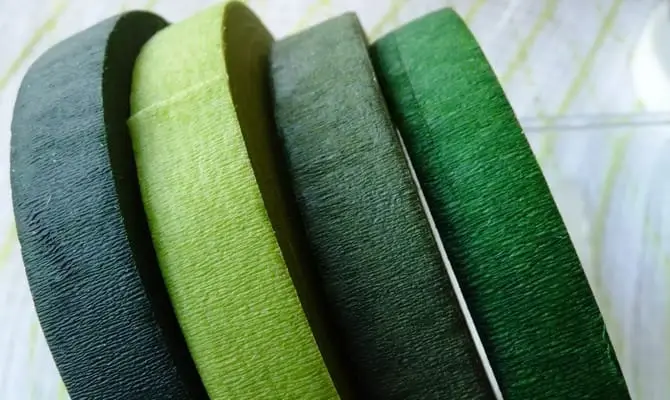
Paper tape, which becomes tacky when slightly stretched, comes in all sorts of colors. Indispensable for making crafts in a shabby style with your own hands are teip tapes of dark green, olive, brown and pink colors. It is used to assemble complex inflorescences, branches, individual petals into a flower, as well as when assembling decorative wreaths.
8 Cotton base on the stem.
It is used as a basis for creating a rose or a closed peony. There are various sizes. The advantage of using such a base is that it helps to create the necessary realistic flower shape. At the same time, it is very light, does not burden the work and is firmly fixed on a thick wire, which allows you to freely dry the product in the process of modeling in a form suspended by the stem, without worrying that the flower can come off the wire under its own weight.
9 rose leaf cutter.
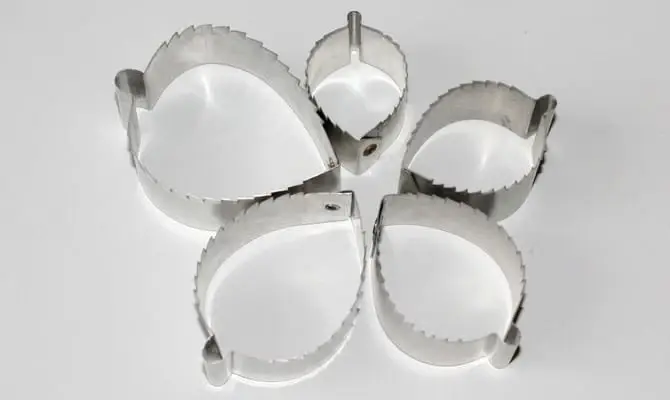
Metal, less often – plastic molds for cutting petals and leaves. However, they significantly facilitate and speed up the work and guarantee an even, regular, uniform shape of the cuts.
10 Latex glue (or carpentry PVA).
Making crafts in the style of shabby chic with your own hands is impossible without glue for assembling flowers from polymer clay. It should be thick and white so as not to change the color of the product. Latex glue is preferable to PVA, since when it hardens it becomes transparent, without yellowness, and it is absolutely not visible in the work.
11 Pliers, round teeth.
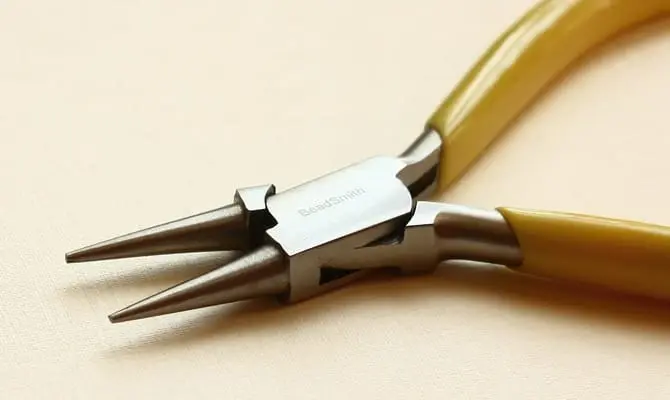
For wire work.
12 Oil paints.
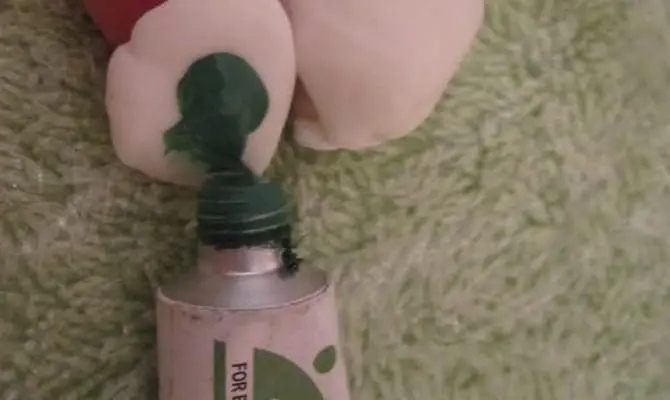
To make DIY shabby chic crafts, you will need a set of oil paints from the primary colors – white, yellow, red, green, blue, purple and black. Oil paints are added to clay in very small quantities. If you add too much paint – cold porcelain begins to crumble, becomes hard, tight and non-plastic. The oil is also used to tint finished flowers and leaves. The petals are tinted with a dry brush with a minimum amount of paint, the tinting is shaded with a hard brush and wet wipes.
16 Flock and decorative pollen.
There are also different shades. White flock is used to imitate villi on stems and leaves, for example, on a poppy stem or leaves of violet and Byzantine chistets (the so-called hare ears).
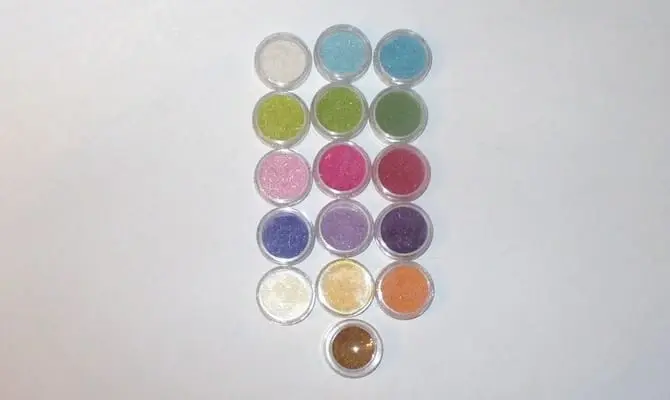
Decorative pollen is needed to decorate stamens and anthers, for example, in a lily or tulip. Yellow pollen is indispensable when sculpting mimosa.
13 Dry artistic pastel crayons.
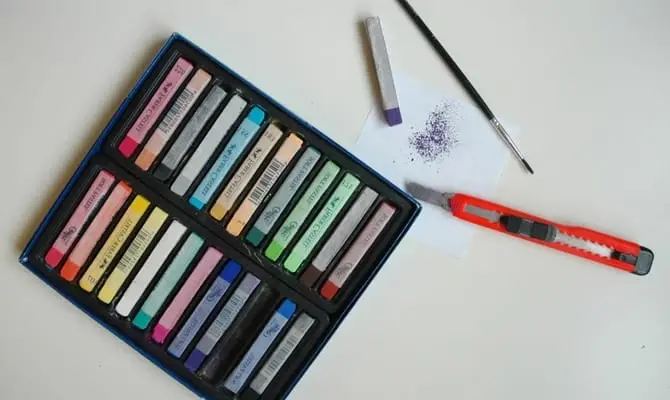
Before you make a shabby chic decor, buy pastel crayons. They are needed for easy tinting of finished flowers. The pastel is ground into a fine powder, which is applied to the petals and shaded with a brush or napkins.
14 Stamens (small rounded and elongated, yellow).
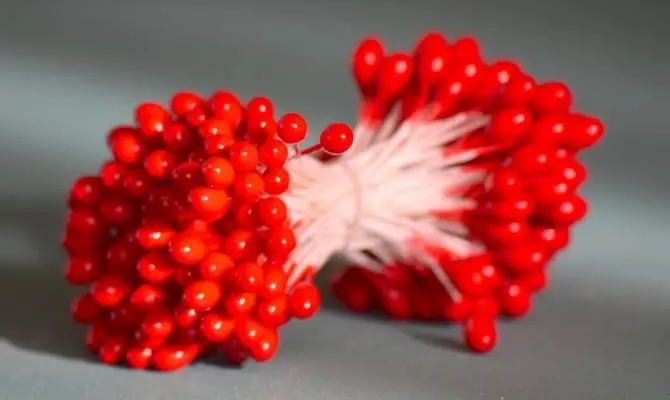
The stores offer a huge variety of ready-made stamens for all kinds of flowers – of any shape, size and color.
15 Cream (regular baby) and wet wipes.
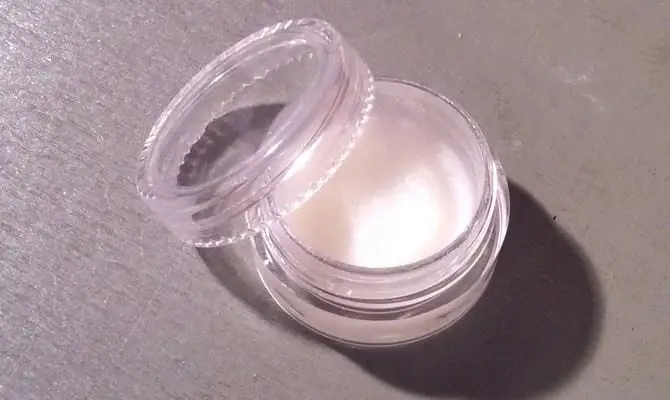
For do-it-yourself shabby chic crafts, you will also need a baby cream – it must be periodically added to the clay during the modeling process, so it dries more slowly and crumbles less, allowing you to work longer on small details. Napkins will save your hands and flowers from small specks sticking to clay during work.
How to make DIY shabby chic crafts
In these DIY Shabby Chic workshops, you will learn how to make the leaves, perianth, and stem of the plant.
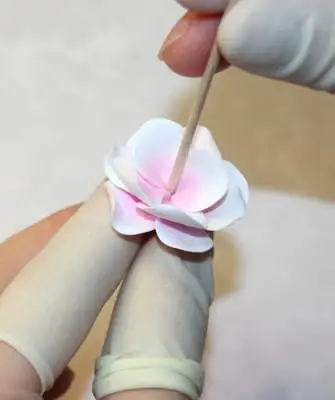
First of all, you need to pay your attention to the modeling of such flower elements as the stem, perianth and leaves. The principles of their modeling are similar for all types of flowers, despite differences in the shape of the leaves and the number of sepals.
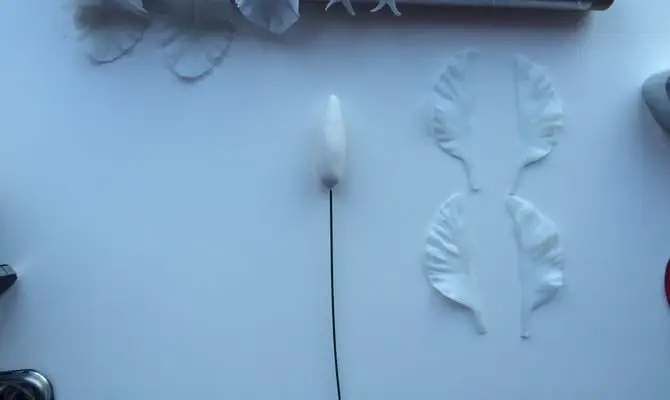
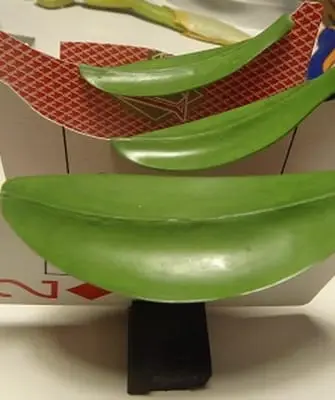
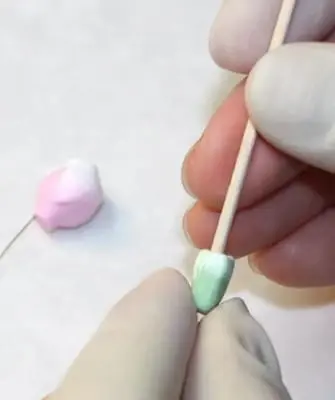
Master class in shabby chic style for making a sheet:
1 Knead some white and green oil paints into a piece of clay. Add a little cream so that the clay does not crack, and carefully knead until a uniform color.
2 We mold a thin layer of clay, roll it out with an additional dumbbell stack M, apply it tightly to the sheet mold (pre-apply a small amount of cream on the mold – so the clay will not tear when removing the sheet from the mold).

3 Cut the sheet with a cutter so that the central vein is exactly in the middle. If necessary, the edges of the sheet can be rolled up with a dumbbell stack. You can also do without the help of a cutter – first we cut out the main shape of the sheet, then carefully cut the edges with thin scissors in a circle, forming small teeth.
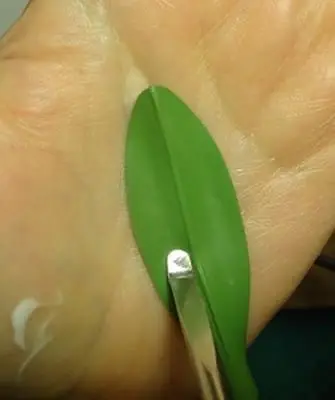
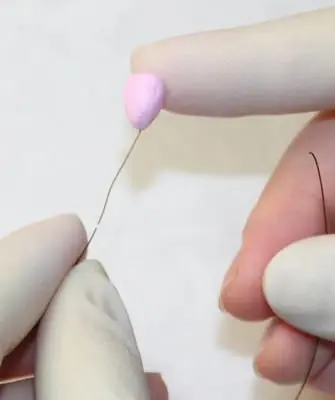
4 We coat the wire No. 26 with a small amount of glue, place it in the central vein of the sheet by about 1/3 of the length, slightly drown it in clay.
5 Gently fold the sheet with your fingers on the reverse side, hiding the wire in the clay.
You can also completely dry the cut sheet and then glue the wire on its reverse side – in this case, the sheet will remain flat, without creases. You can collect the leaves into a twig using a teip tape, wrapping it tightly around the stems.
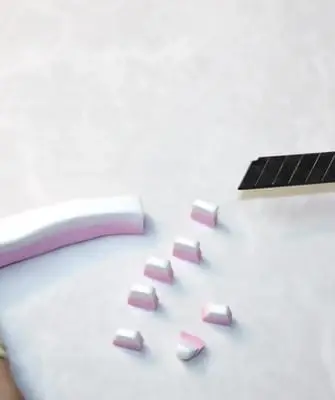
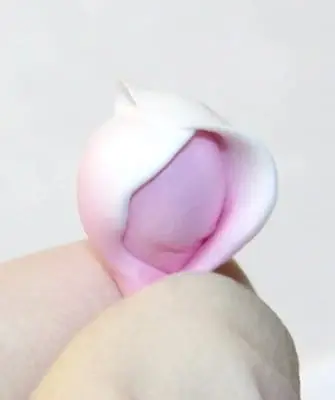
Master class for shabby chic for making perianth and stem:
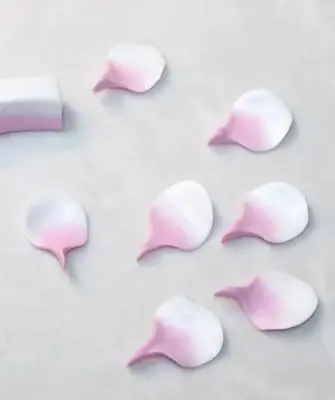
1 To create a sepal, we take a piece of clay with a diameter of about 1 cm, form an elongated drop from it. We roll out the drop with a dumbbell stack M, if necessary, cut uneven edges with scissors.
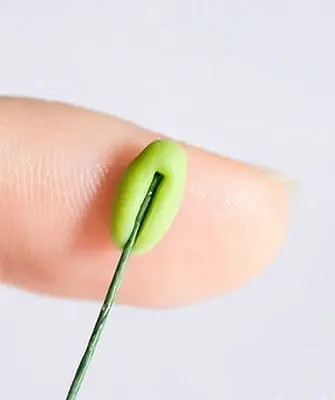
2 We roll it out a little, coat the resulting tape with glue and place the wire on it.
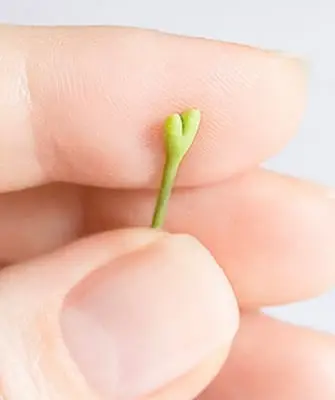
3 Carefully close the edges of the tape around the stem, smooth the joint with fingers dipped in water until it is perfectly even.
Caring for self-hardening polymer clay flowers
Cold porcelain flowers are strong enough for all their apparent fragility. However, there are some care tips for these products that will allow you to keep your work clean and tidy for years to come.
- It is necessary to avoid prolonged contact of products with water, otherwise; flower petals may be deformed, and their color may also change. Since the polymer clay you work with is not fired in an oven, but hardens in air, it is not so stable and, when wet, it begins to soften somewhat again, lose its shape, becomes viscous and sticky to the touch. With a slight ingress of iodine, you need to wipe off the moisture with a napkin or dry the flower with a hair dryer. In this case, the work will not be damaged.
- It is advisable not to put flowers made of cold porcelain or cellulose clays under direct sunlight for a long time – in the end, the color of the flowers may fade or change somewhat.
- It is best to clean flowers from dust with a dry, soft, clean brush, as well as with a hairdryer (for a short time and from a certain distance).
- When falling, most often the flowers are not damaged, the petals are only slightly deformed, they can be gently straightened. But it's better not to drop it, because when falling on a tile or falling flowers along with a heavy vase, the thin edges of the petals can crack or crumble, which is difficult to restore or change.
Shabby chic technique: master class with video
In this do-it-yourself Shabby Chic master class, you will learn how to attach cold porcelain flower arrangements.
There are many ways to assemble a composition of flowers from floristic polymer clay. Harmony and the final look of the work depend on the assembly, and the strength and durability of the product depend on the quality of the fastening of the composition.
It is advisable to think over the composition and assembly of your bouquet even before starting work, so that you have a clear idea of what shade, size and shape of flowers you want to mold.
As you can see in the photo of do-it-yourself shabby chic products, the most common and beautiful way to arrange flowers is to make a bouquet:
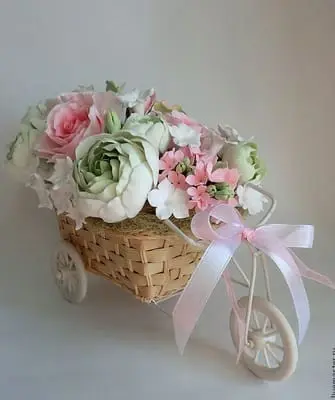
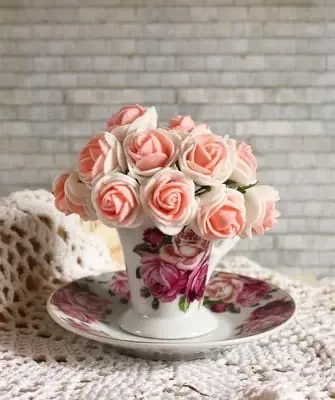
A bouquet, according to the original definition of German florists, is a bunch of flowers in the amount of more than three pieces. A bouquet of flowers as an independent, conscious art form appeared in Germany around the middle of the 19th century. To create it, you need to fashion full-sized flowers with stems and put them in a suitable vase or tie them with a beautiful ribbon. Bouquets can be of various shapes – round, triangular, pyramidal, hemispherical, one-sided, diagonal, as well as symmetrical and asymmetrical. Additional greenery and large leaves emphasize the beauty of the bouquet.
Bouquet cuff – a kind of fabric "skirt", serves as a kind of supporting frame, creates an additional background and mood for the composition, emphasizes the tenderness and grace of flowers.
The cuffs are used in conjunction with porta-ketnitsa – this is a frame for a bouquet with a handle, which is based on a floristic oasis (synthetic moisture-absorbing foam material).
Incredibly elegant and beautiful completion of a European-style bouquet, as well as a shabby chic bouquet, is the luxurious decoration of the “legs" of the bouquet with openwork lace, wide decorative braid, organza or satin ribbon, silk fabric, twine and original little things – a vintage brooch, fixed on the leg, strings of pearls, rhinestones, crystals, buckles and metal buttons. Such details make each composition truly unique.
Now check out the shabby chic master class on assembling a flower arrangement using a container that is suitable in size and style. Floristic clay flowers can be fixed in a wicker basket, a small vase, a cup, a tin planter, a watering can, a decorative pot, or on a dish. To do this, you can use a bar of a floral oasis, cutting it with a clerical knife to the desired size and inserting it into the selected container so that it fits snugly in it. The positive aspect of this method is that the container does not suffer at all – at any time you can remove flowers from it and use it for another purpose.
The downsides are that this floral foam is designed essentially to keep cut flowers alive and provide them with moisture for some time.
The porous material is soaked in water and retains it in its capillaries. For ceramic flowers, of course, it is possible to use only a dry bar, but it is fragile, quickly crumbles and collects dust. Therefore, after some time, it will begin to break under the weight of ceramic flowers and the whole composition will be loose and weak. It is better to use polyurethane foam for fastening such works from polymer clay. Fill the foam with about half the volume of the container, leave to dry. After complete solidification, we take a knitting needle, pierce the foam at the right angle and paste the finished flowers into the holes, while trying to cover the surface of the vase / bowl with flowers and foliage completely, without gaps, as the foam turns yellow over time and it is desirable that it is not visible in the work.
Please note: when filling the basket with foam, you must first sew a plastic bag inside or lay a couple of layers of a transparent film, otherwise the foam will flow into the cracks during solidification and expansion and ruin the whole work. A significant disadvantage of this method is that it is almost impossible to return a vase or other container to its original appearance and completely clean it after applying the mounting foam.
But you can not worry that your work will quickly lose its original appearance or crumble when dropped.
Decorative wreaths with flowers, hung on the door or decorating the wall, look beautiful and interesting in the shabby interior. Also, recently, flower wreaths have come back into fashion, decorating the hairstyle and complementing the sophisticated, light images of girls on special occasions – for example, at a wedding, prom, birthday.
Flowers can be fixed with a thin ribbon on the rim, or you can create the basis for your wreath from scratch. To do this, we take several wires of medium thickness, bend them into a circle of the desired diameter and tightly wind the hoop with floral tape. Next, using the same teip tape, we carefully and tightly wrap the finished flowers and leaves made of polymer clay to each other.
Try to position the flowers alternately, pointing both to the outer side of the wreath and upwards – then the work will turn out to be evenly filled and will look harmonious from any angle. Closing the wreath, attaching the last flowers, cut their stems-wires shorter than those of the first flowers, hide them between the flowers at the beginning of the hoop, tightly fastening them with teip tape and then smearing it with a small amount of glue. Ideally, the junction between the beginning and end of the wreath should not be visible.
No less charming look interior wreaths of flowers fixed on wicker bases made of rattan, wicker or tow. You can fix cold porcelain flowers on such a frame with a strong fishing line or thin wire. Light and airy flowers made from cellulose floristic clays can be glued directly to the wreath branches using a glue gun.
To fix miniature compositions in small containers (such as, for example, a decorative nest or a small bowl), you can use a piece of polymer clay. It is preferable to take cellulose "marshmallow" clay, as it is much lighter than cold porcelain and will not weigh down the final composition. Both clays give good adhesion to various surfaces, but it is advisable to coat a piece of plastic with latex glue or thick carpentry PVA before gluing it into a container. Flowers must be fixed immediately, in clay that has not yet hardened, otherwise, after drying, it will be very difficult to make holes in the surface and firmly glue the flowers.
Polymer clay flowers are assembled into original flat panels and compositions that can be directly hung on the wall or framed. So, for example, a heart made of polymer roses looks beautiful. To create it, take a heart-shaped blank cut out of foam as a base, glue thick cardboard to its reverse side, and a layer of cellulose polymer clay on the upper side.
Next, cut the stems of the finished cold porcelain flowers to a length of 1-2 cm and glue them into the base tightly to each other, without gaps, applying a large amount of latex glue. Leave the finished heart to dry for at least a day.
Then carefully coat the letter with a layer of latex glue, glue uniform thin (not thicker than 5 mm) layers of cold porcelain onto the paper, trying not to go beyond the contours of the silhouette.
We prepare fashioned and well-dried flowers in advance, cutting the stems as short as possible with pliers. We glue the flowers into the clay that has not yet hardened, trying to completely fill the inner space of the letter and also covering the end of our workpiece with them (on all sides). As a final touch, glue small, well-dried small leaves to your letter. Leave the work to dry for a day, then glue thick cardboard on the back of the paper and insert the composition into a suitable frame.
Thus, you can create any flower inscription, name, symbol, silhouette of a picture.
In a similar way, you can fix fashioned flowers on a painted picture or printed photograph, creating a work of unique beauty and originality, in which a drawing, a still life will be combined with a voluminous, embossed flower cap.
We should also mention the possibility of decorating various objects with handmade flowers.
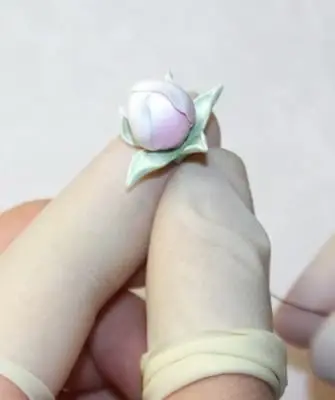
Photo frames, caskets, mirrors or boxes decorated with flowers and leaves made of polymer clay also look beautiful.
And now watch the video of the DIY Shabby Chic master class, which will help you better understand how crafts are made: